How to hang your board
-
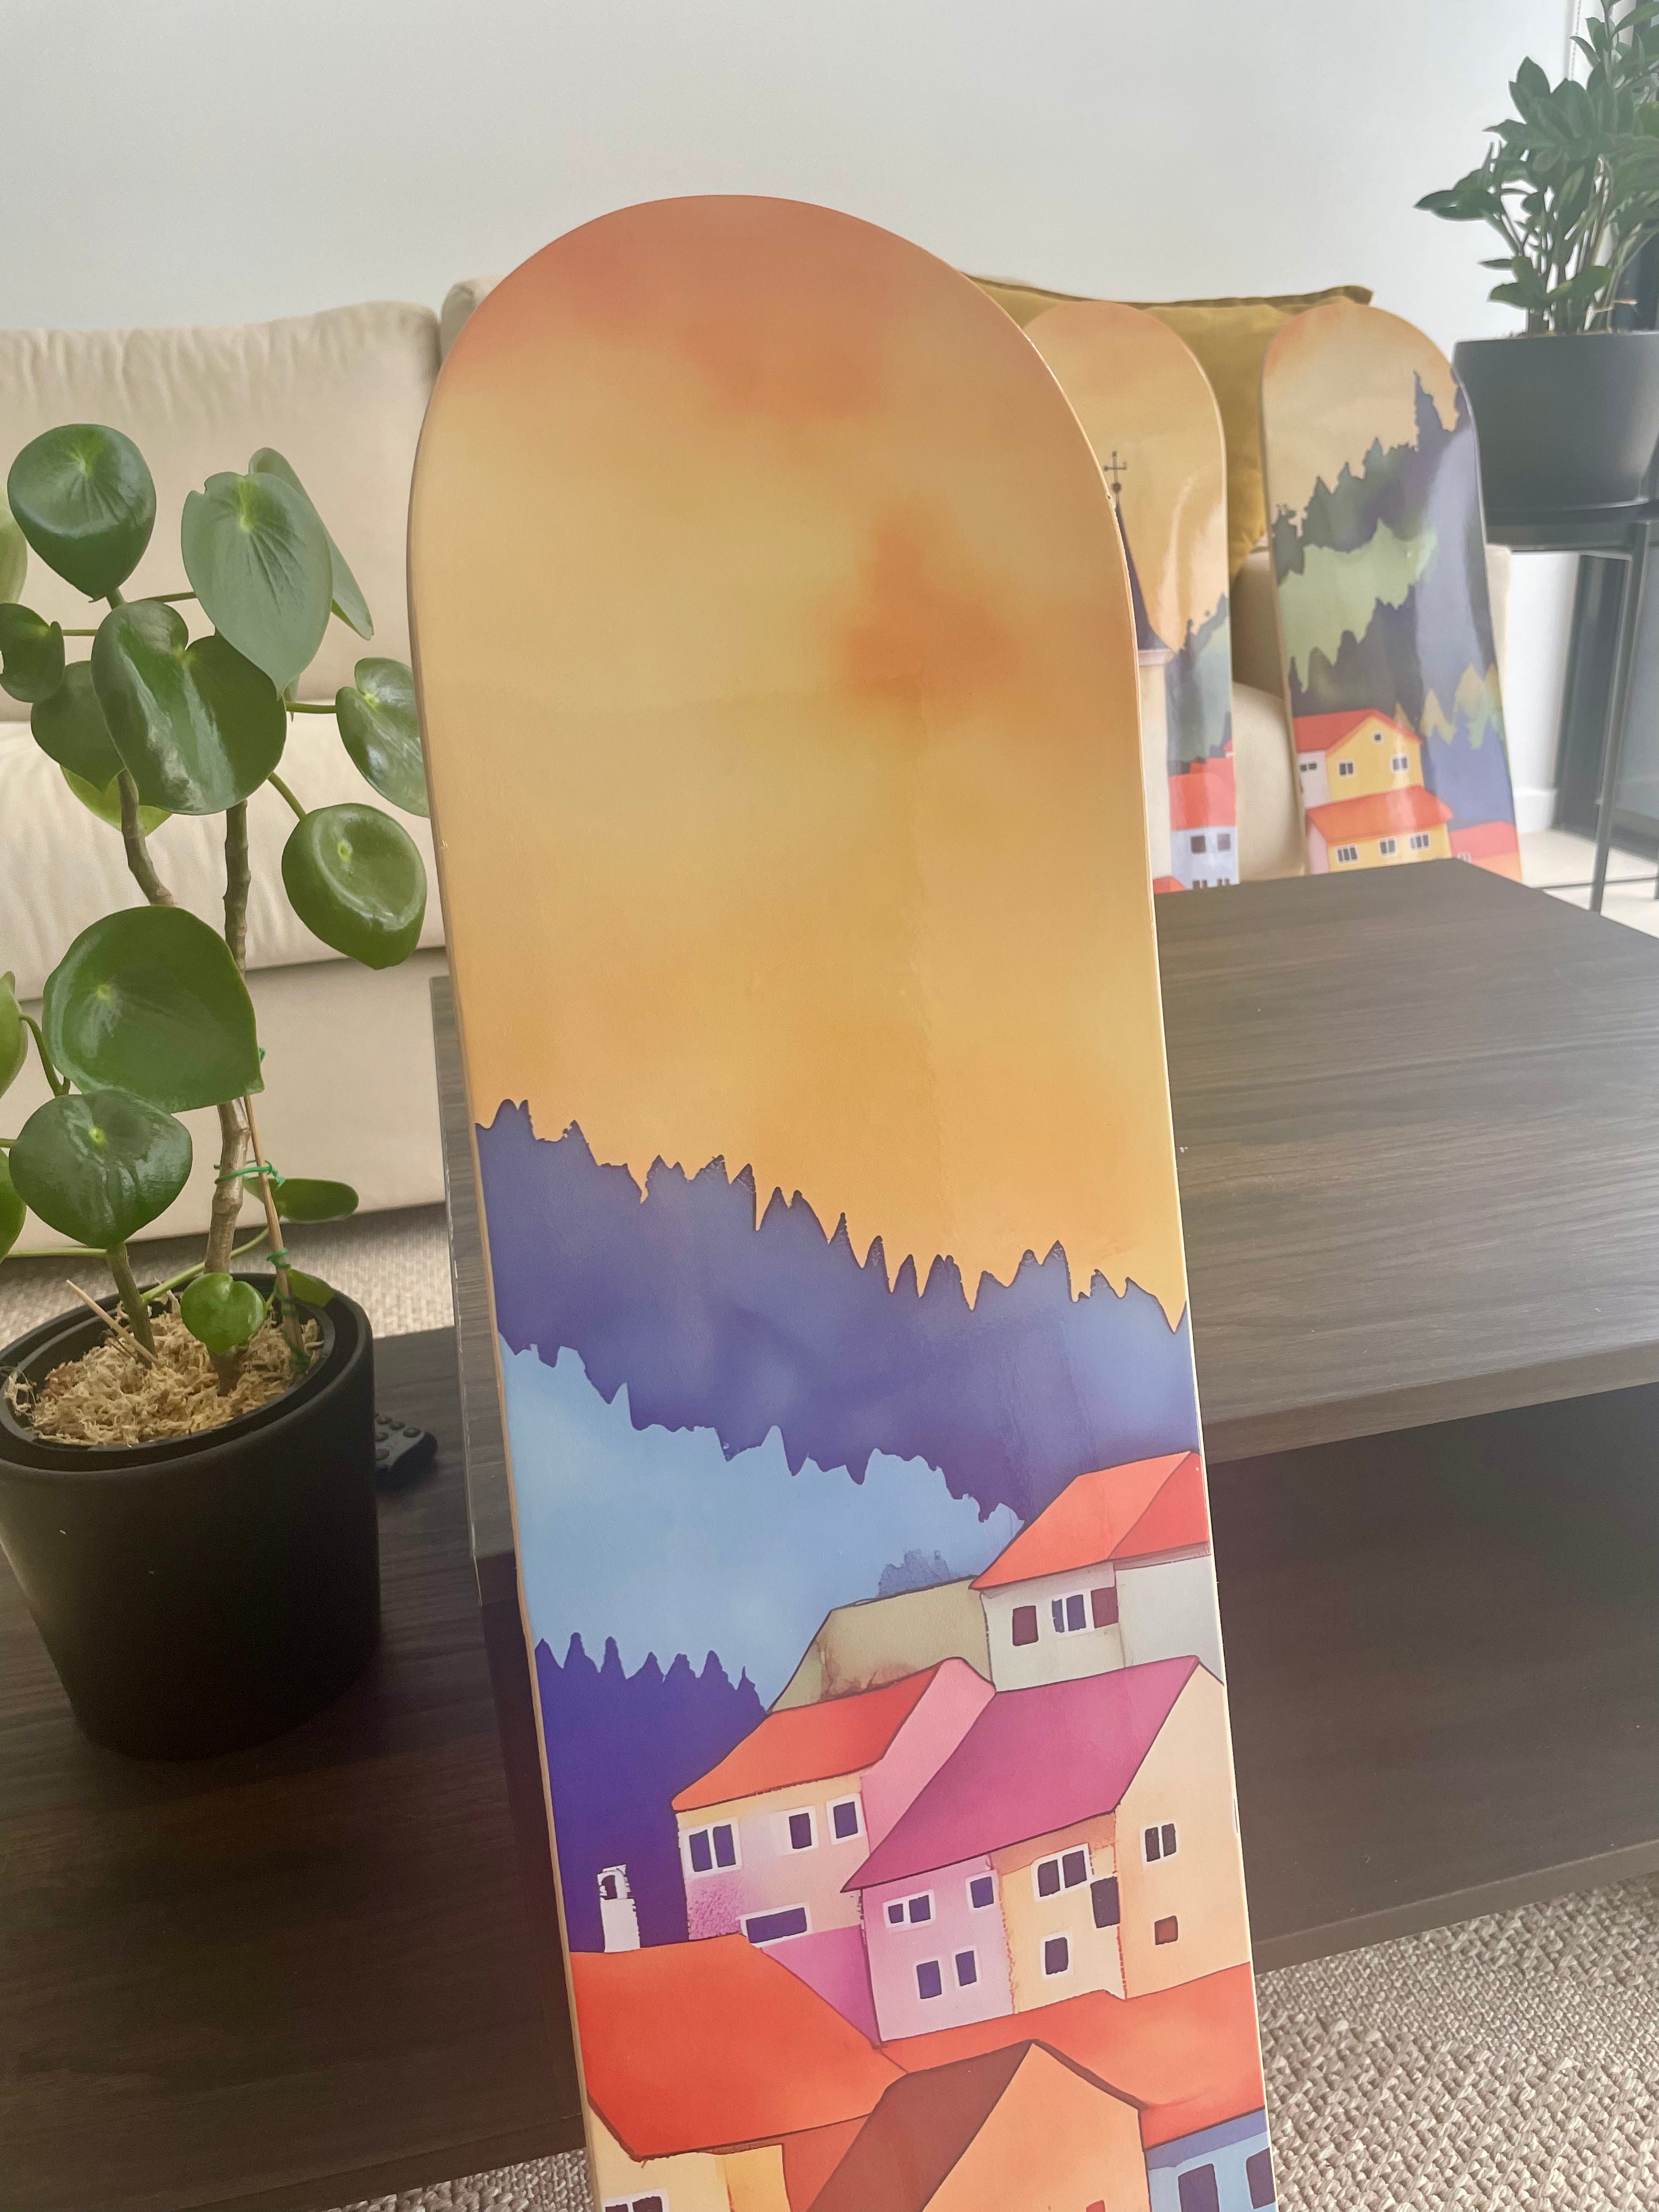
Unpack your board
Unpack your board carefully, being sure not to scratch the print.
-
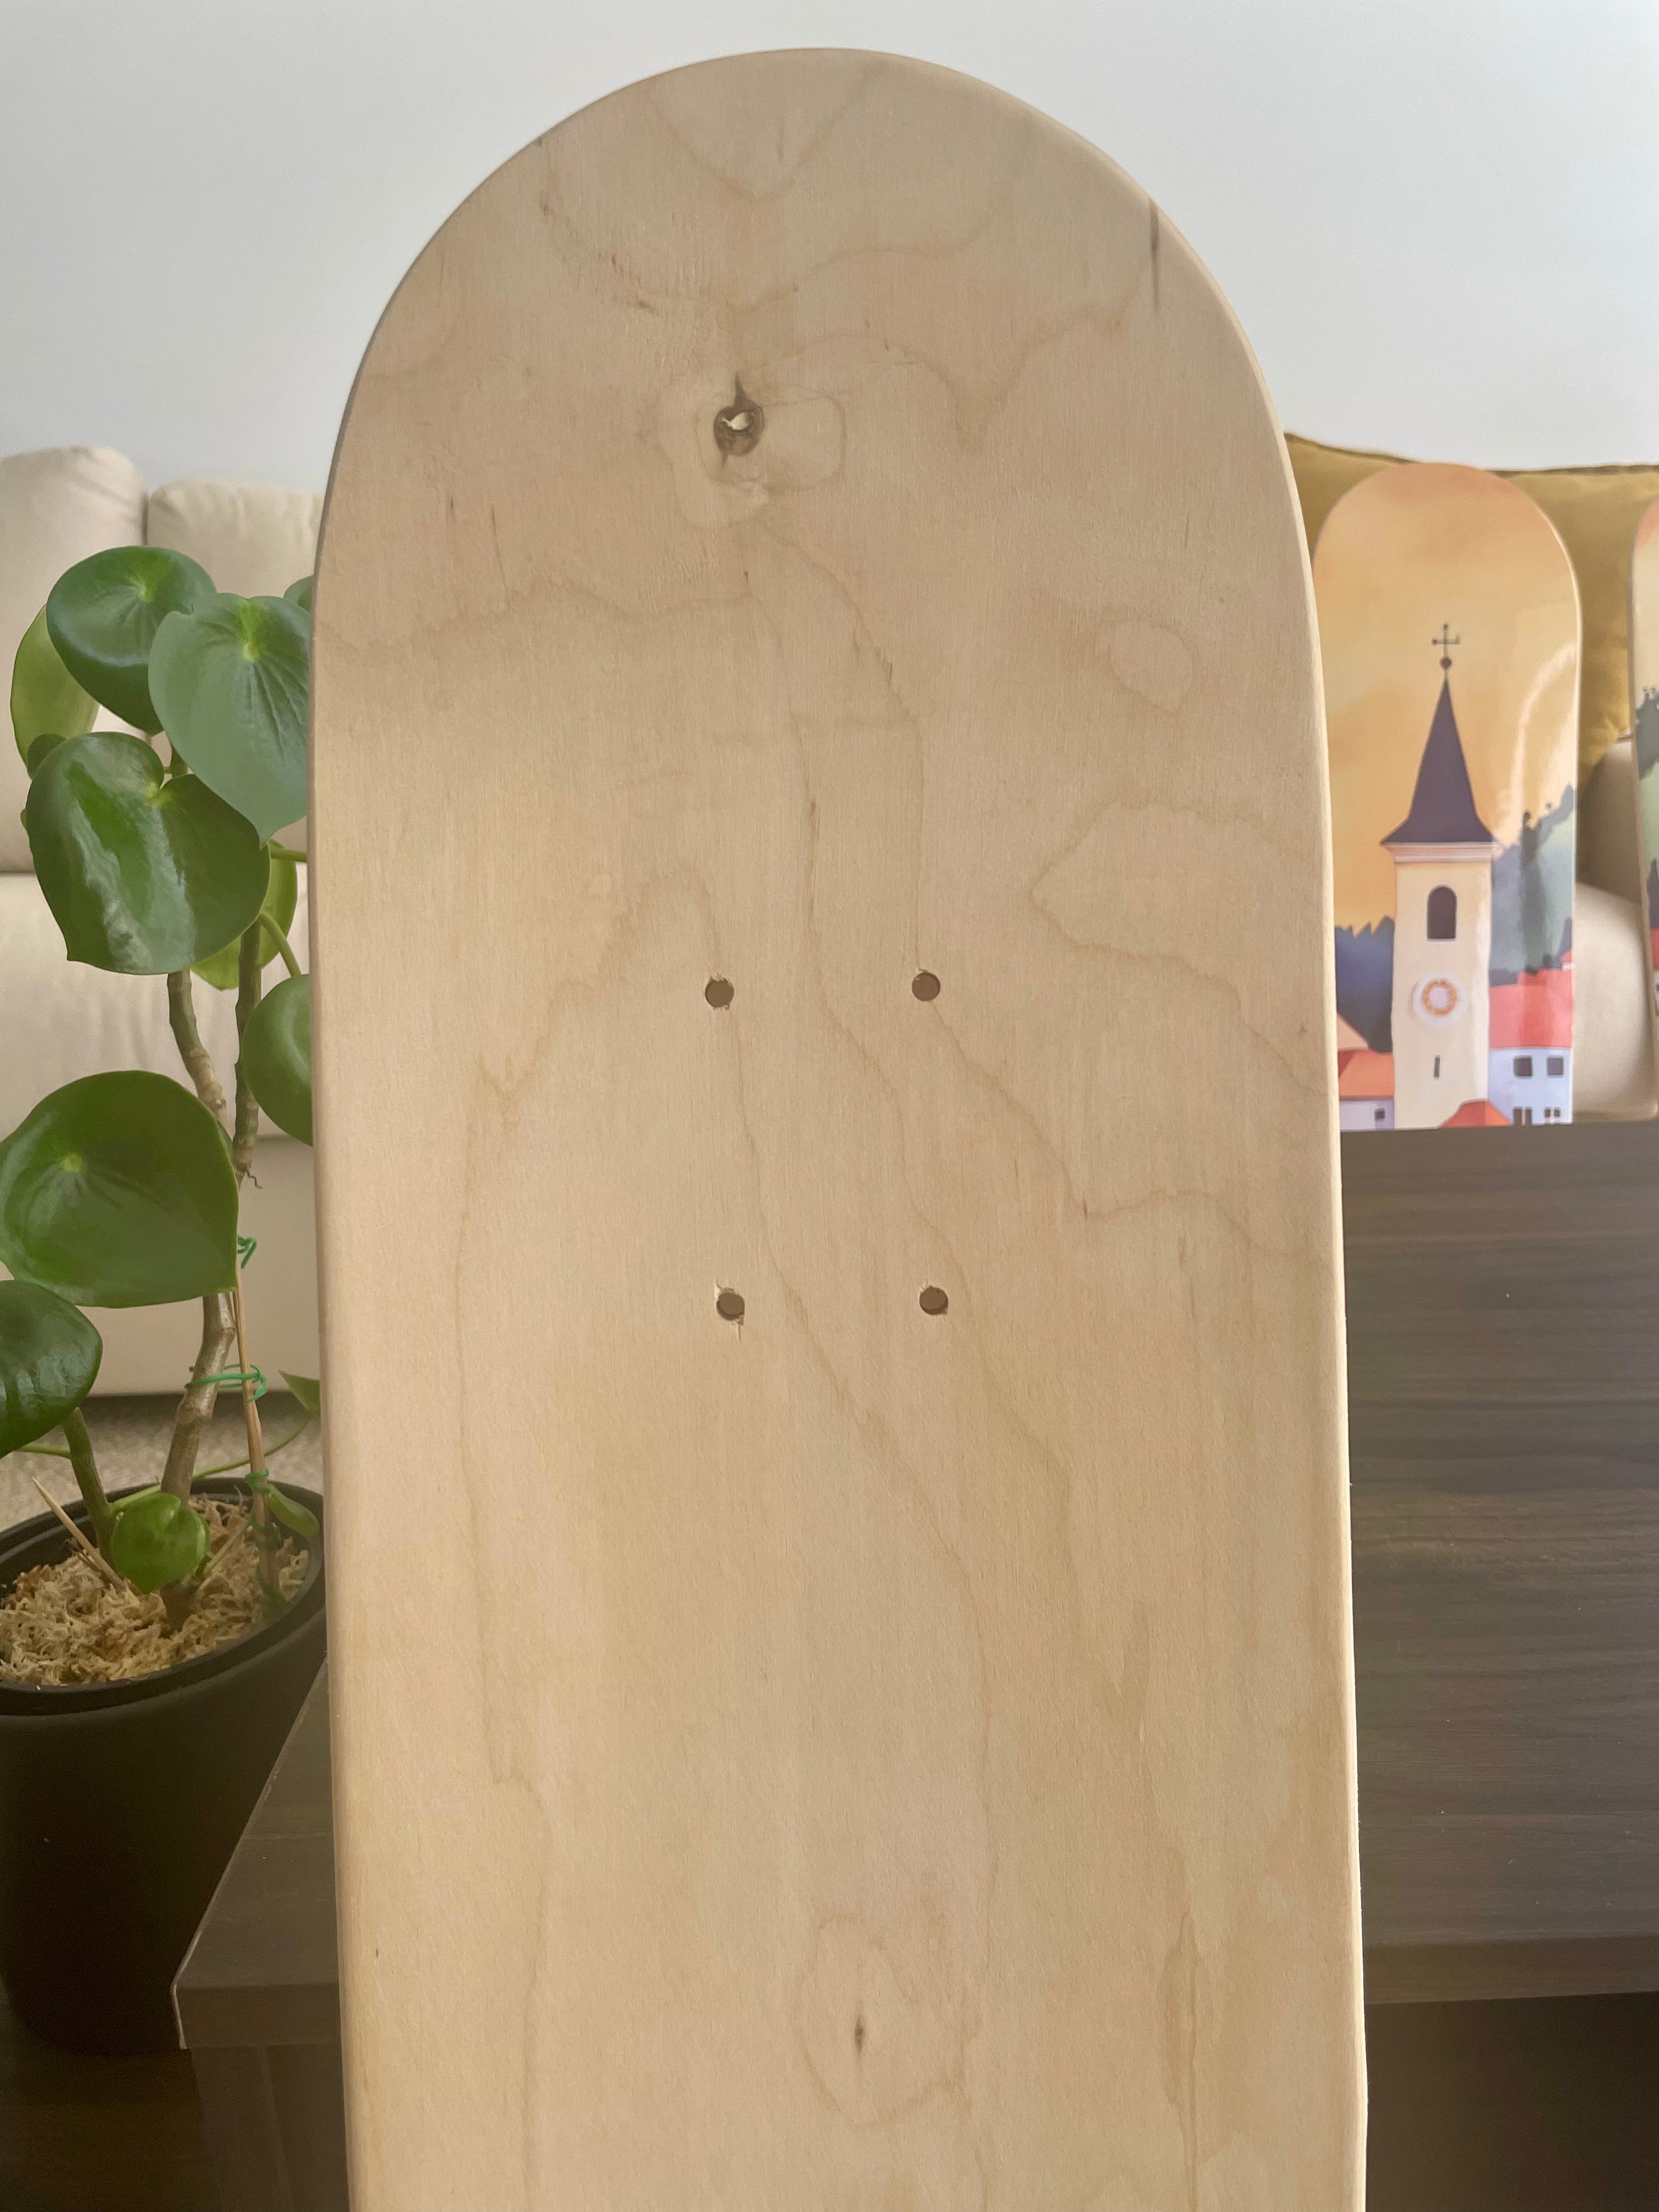
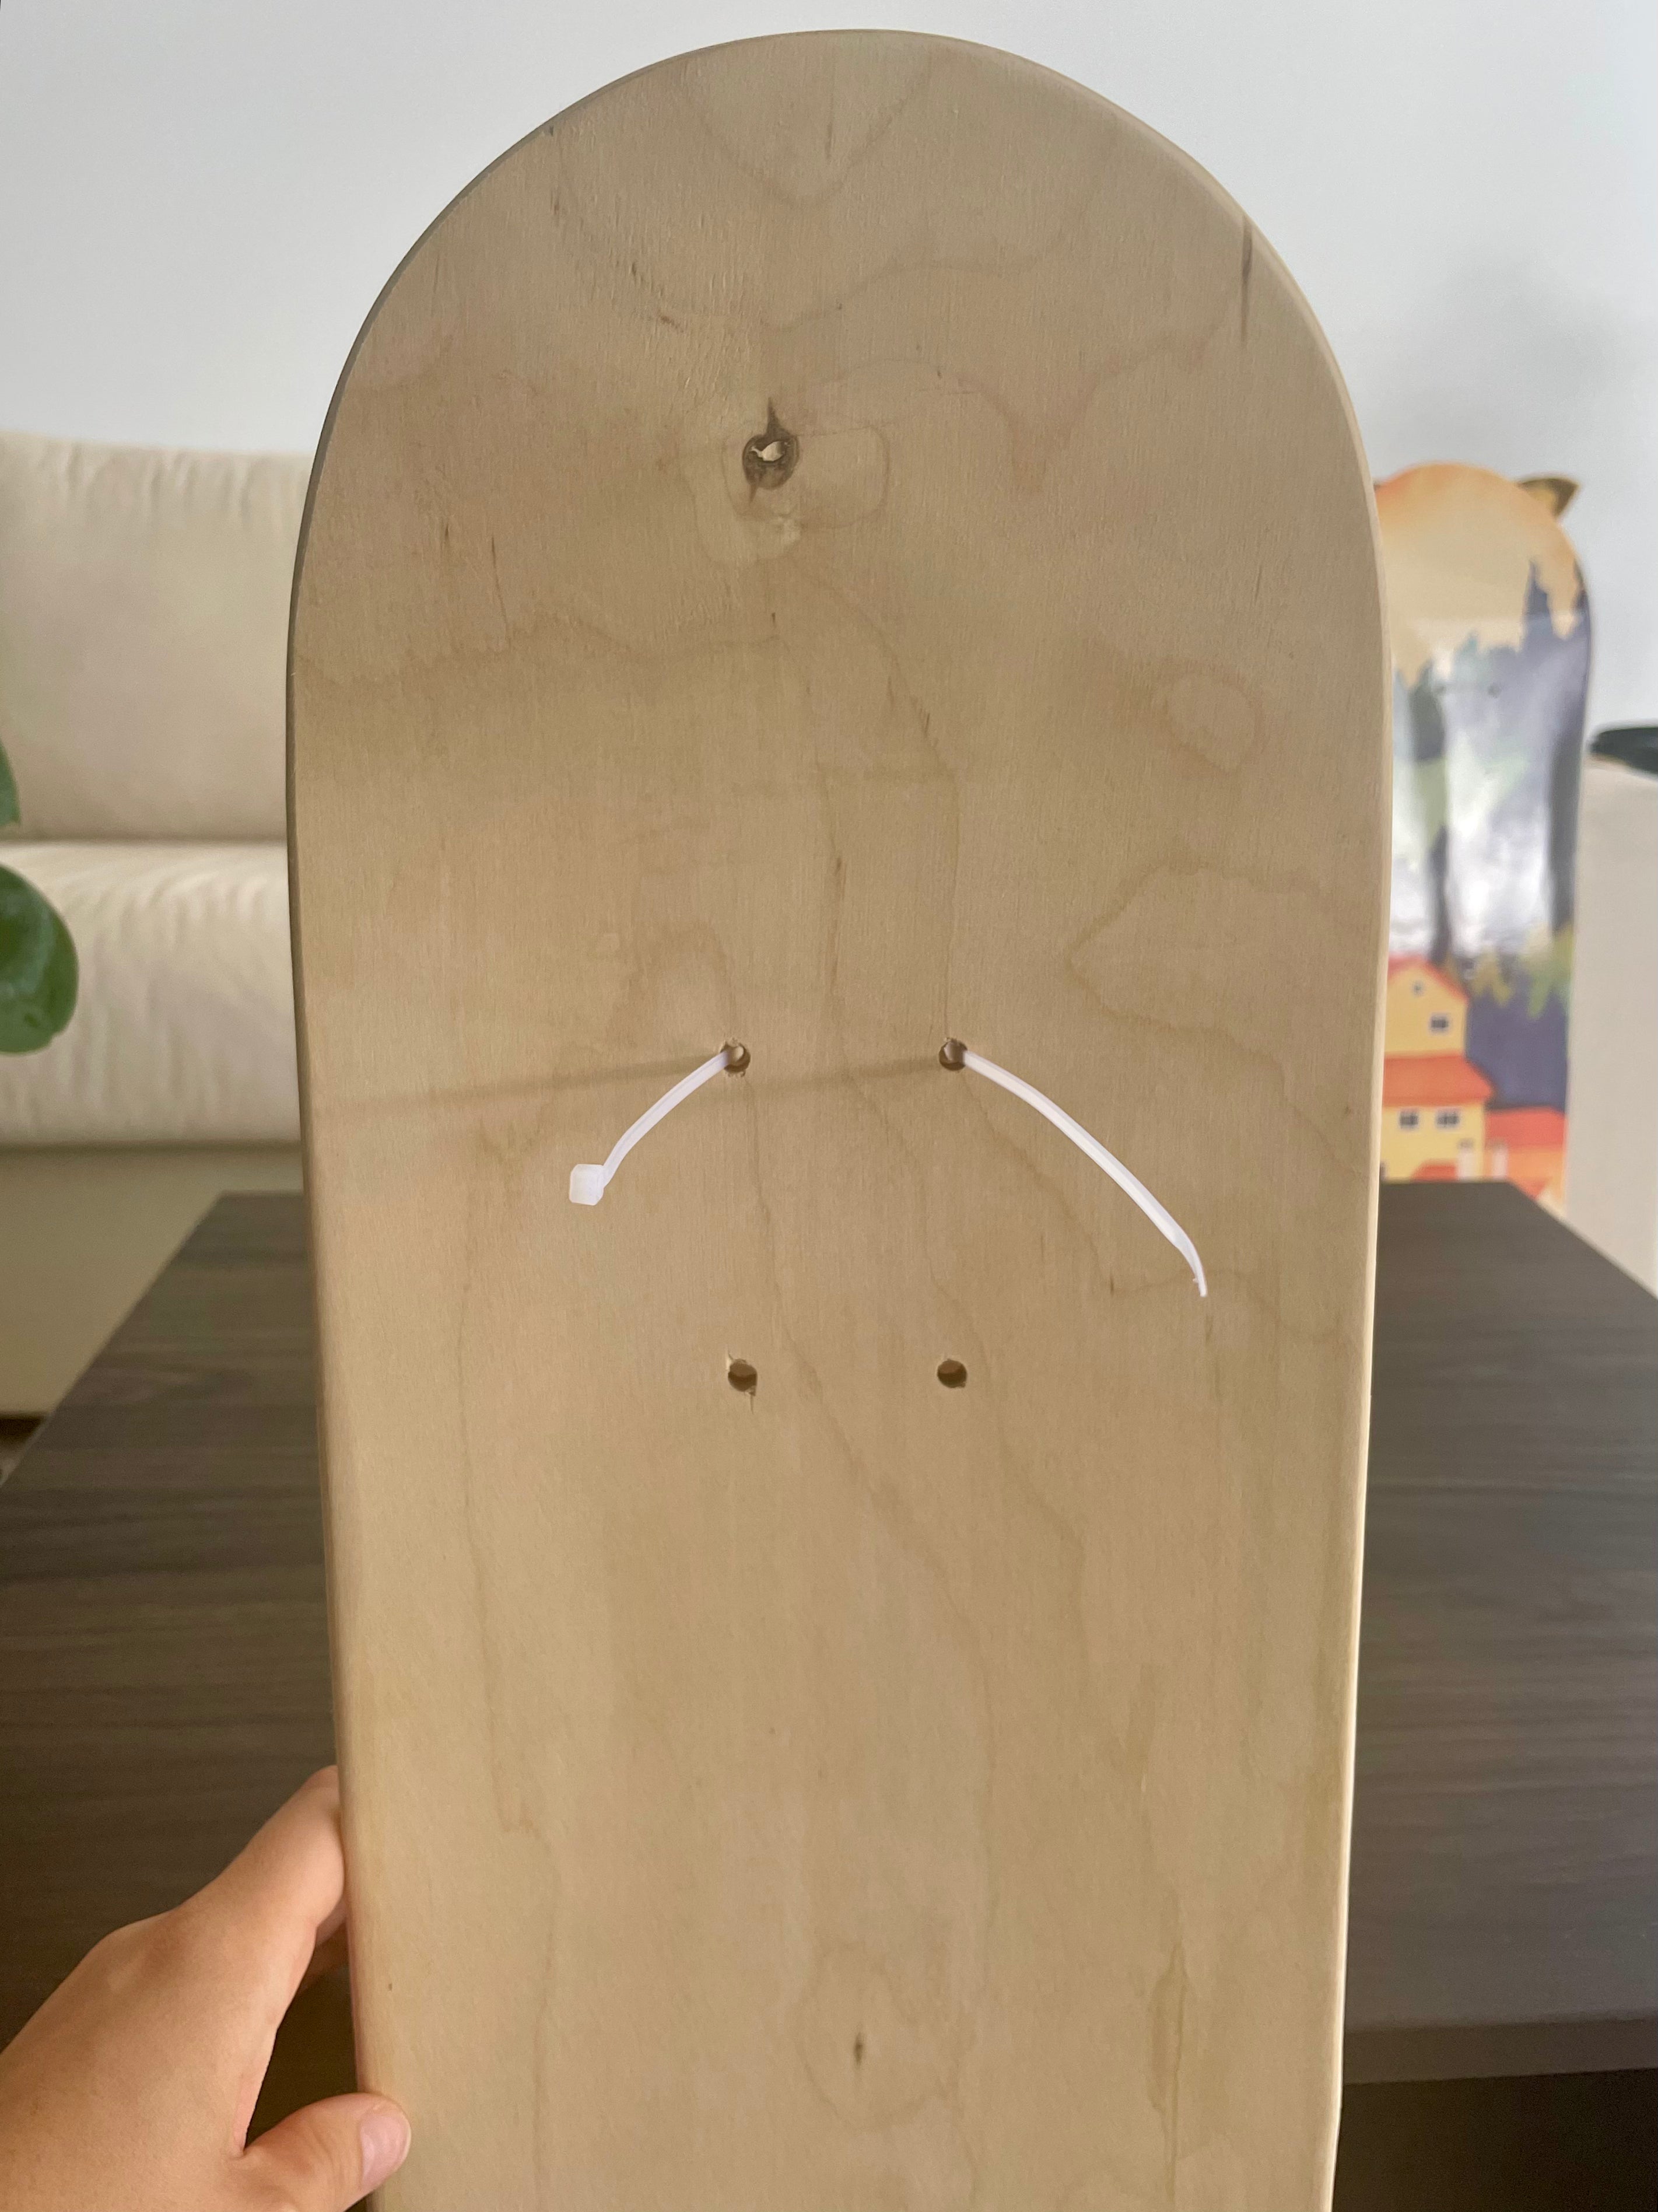
Check the hanging options
On the top side of the board you will see eight pre-drilled holes.
-
Select your hanging option
Select how you wish to hang your board. Here we have opted to hang it using the top two holes.


-
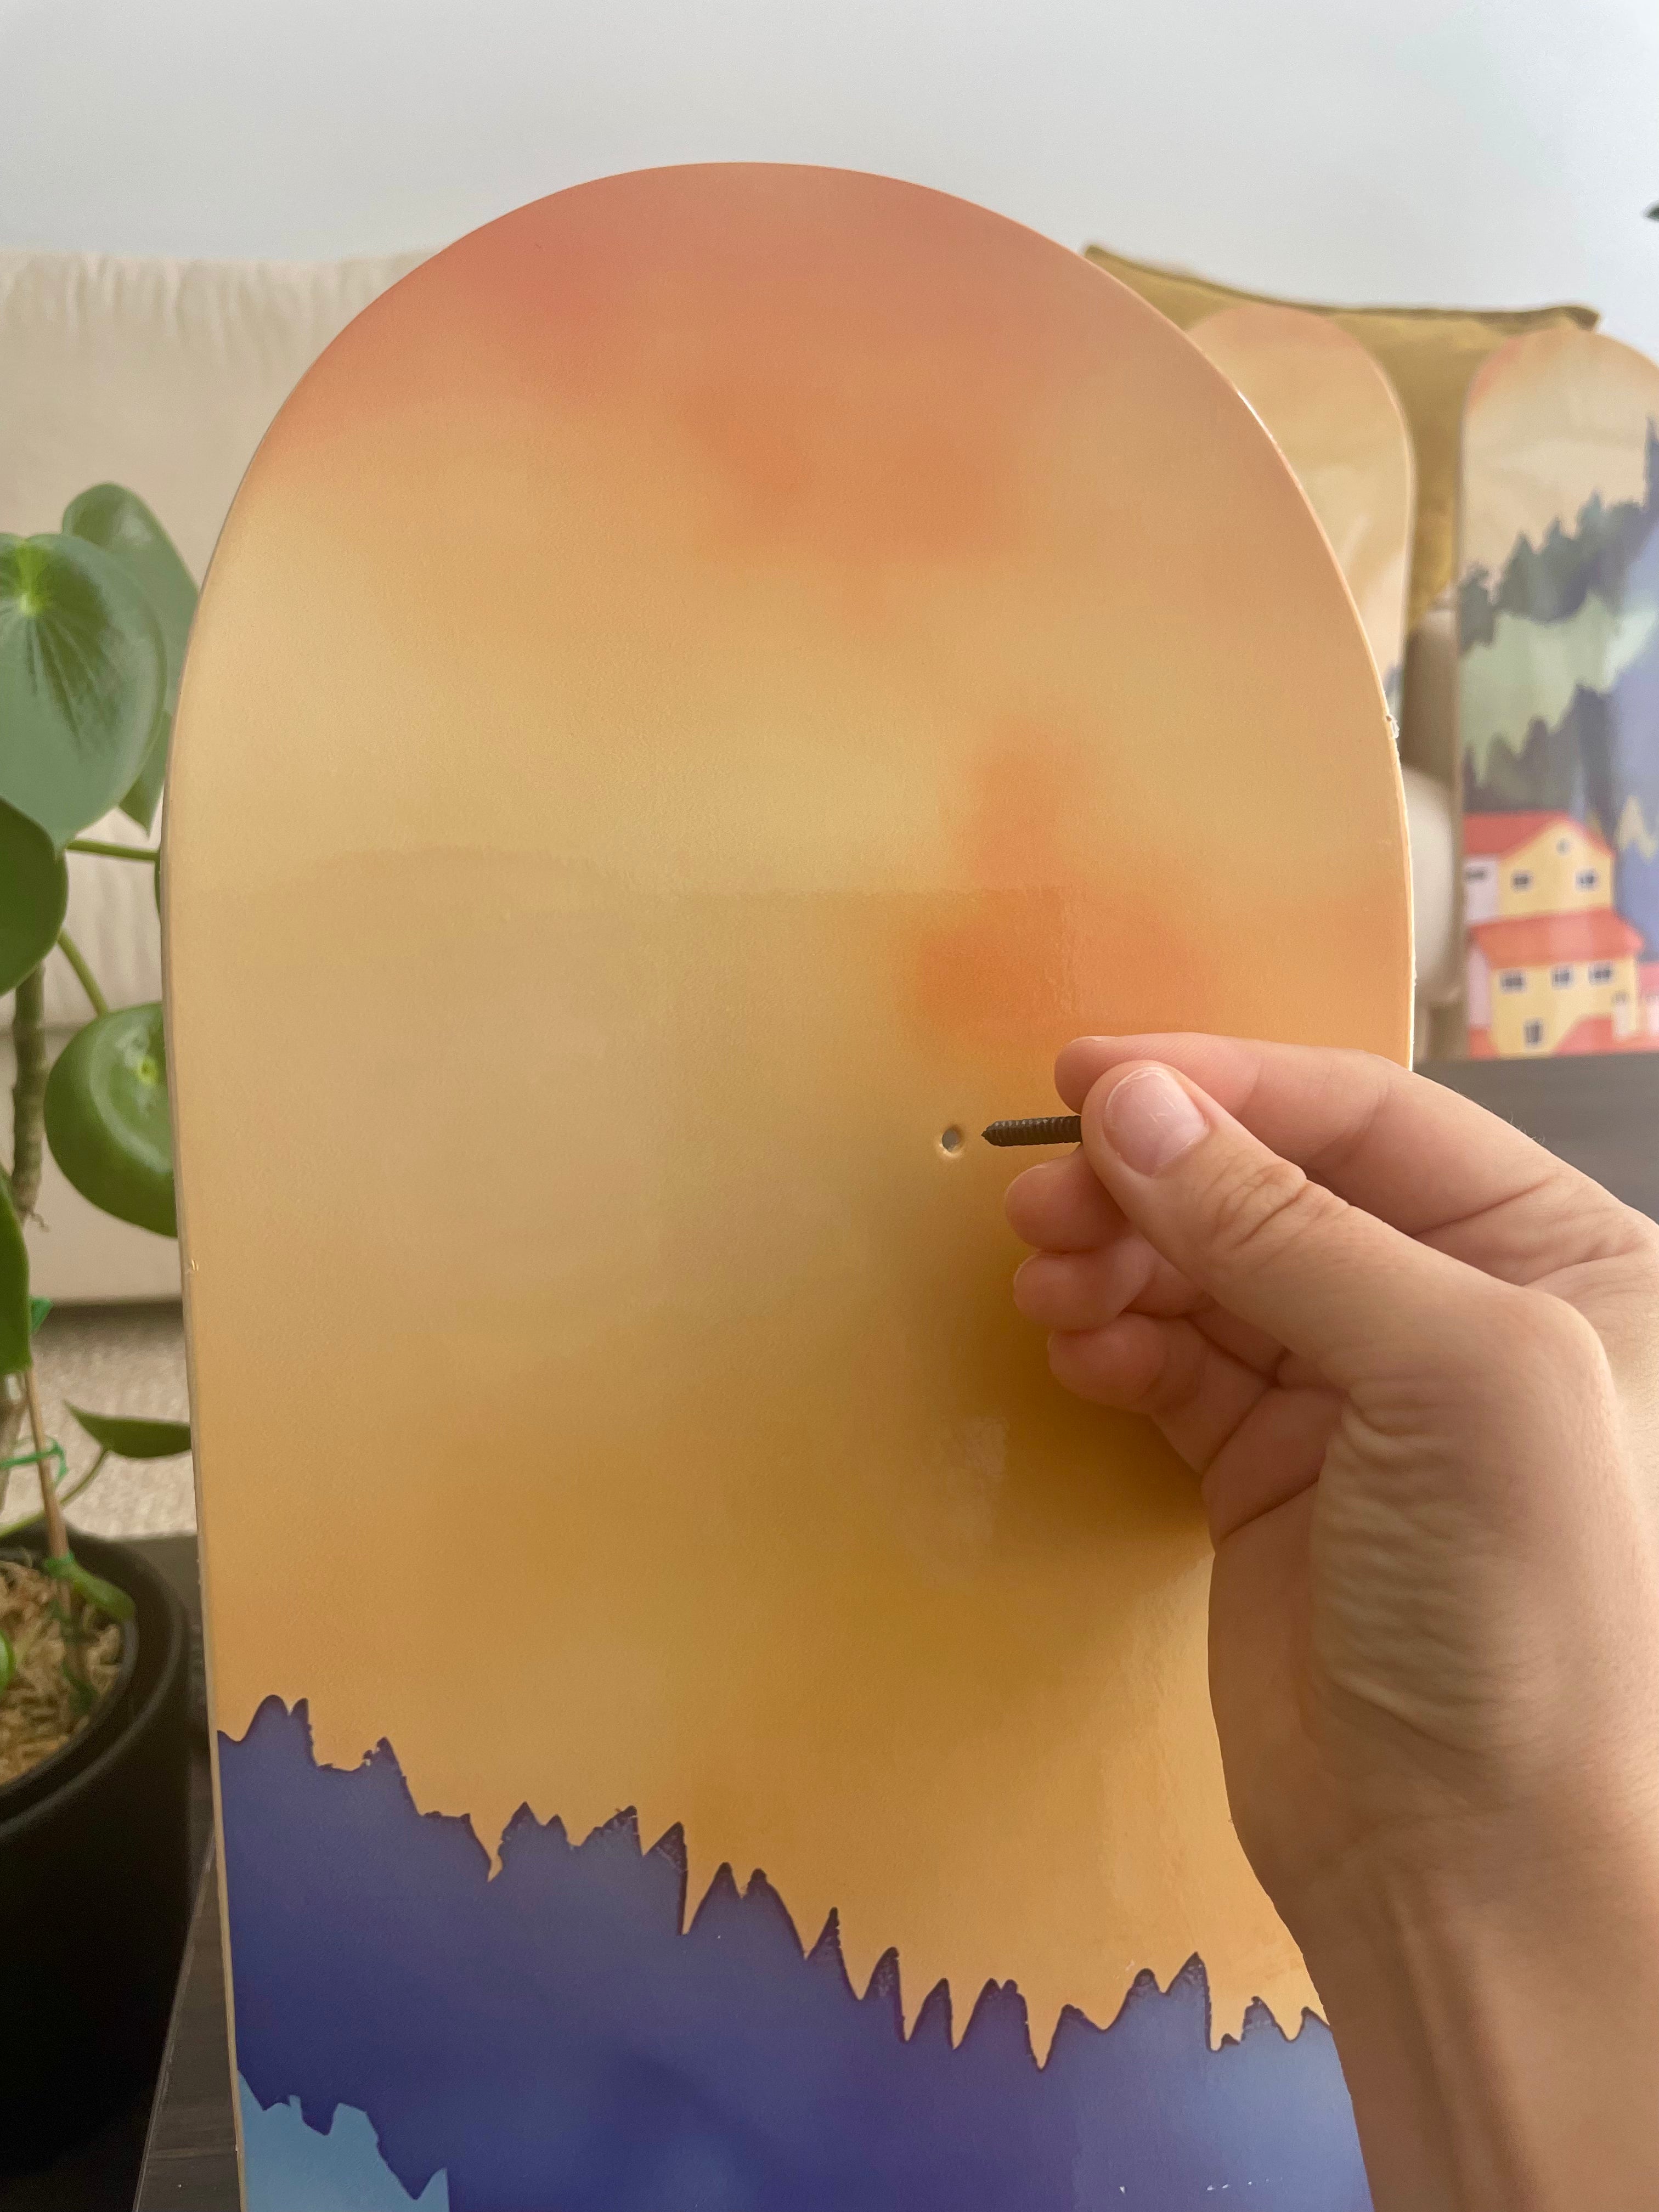
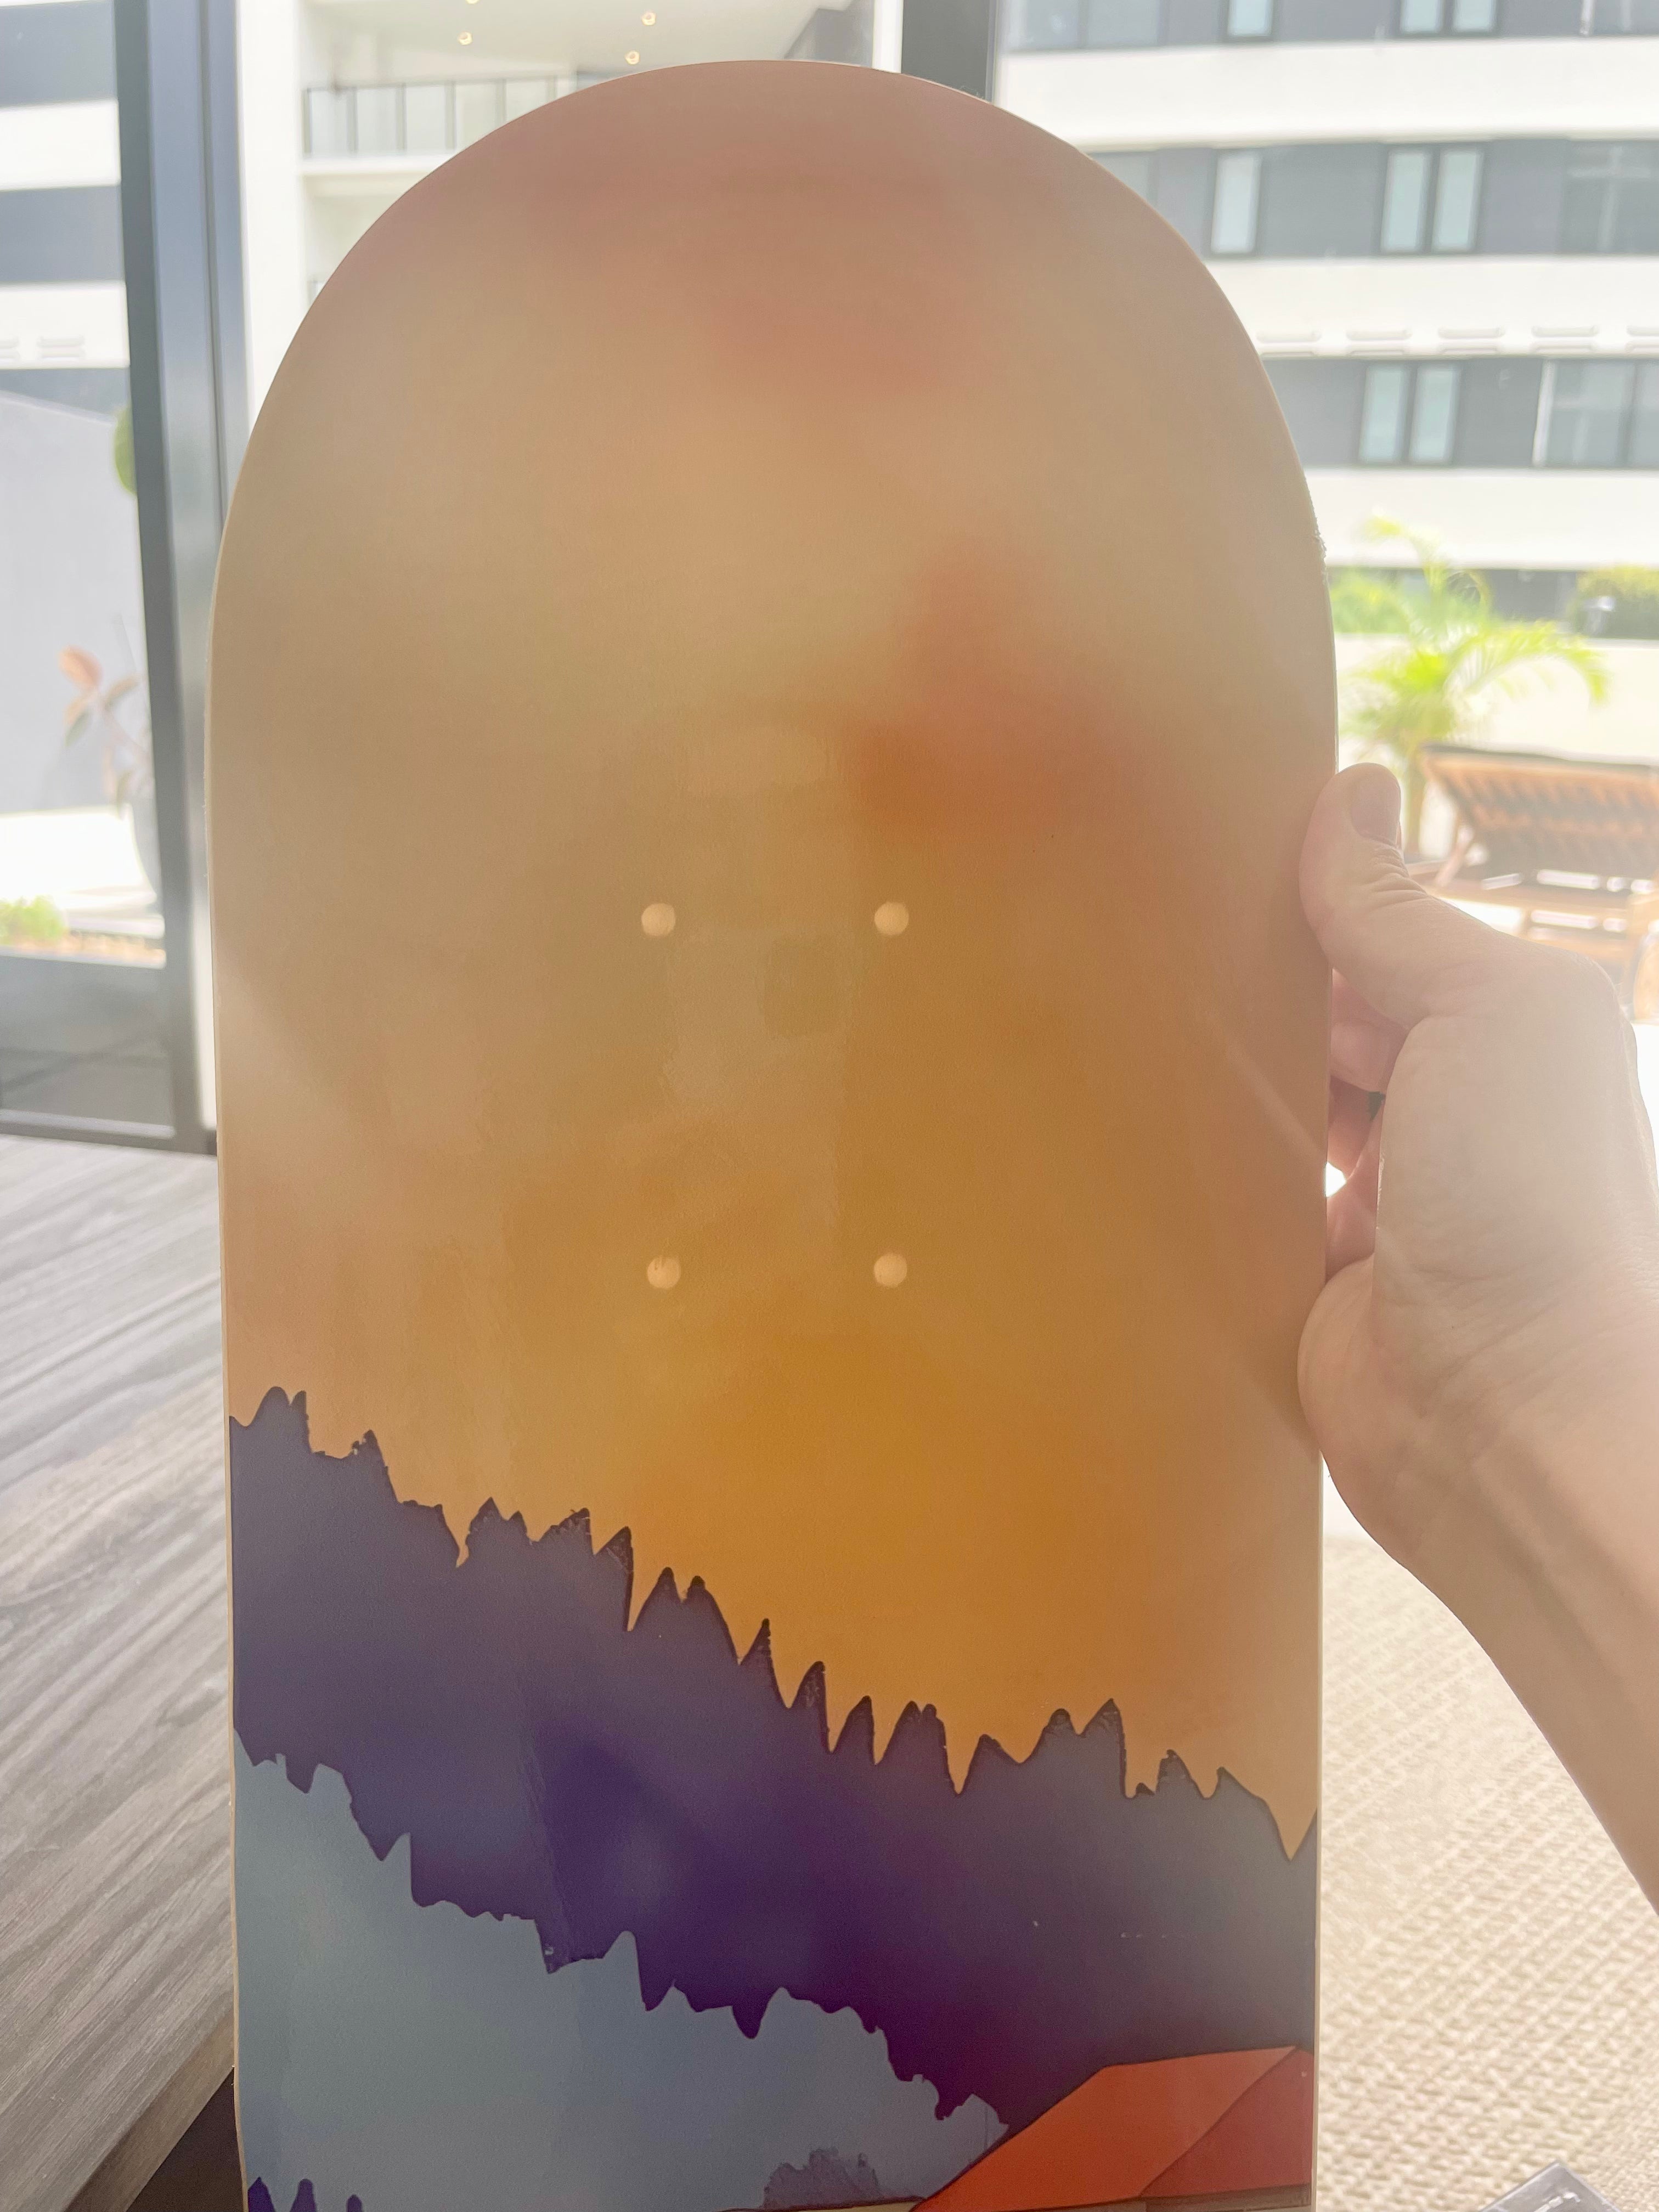
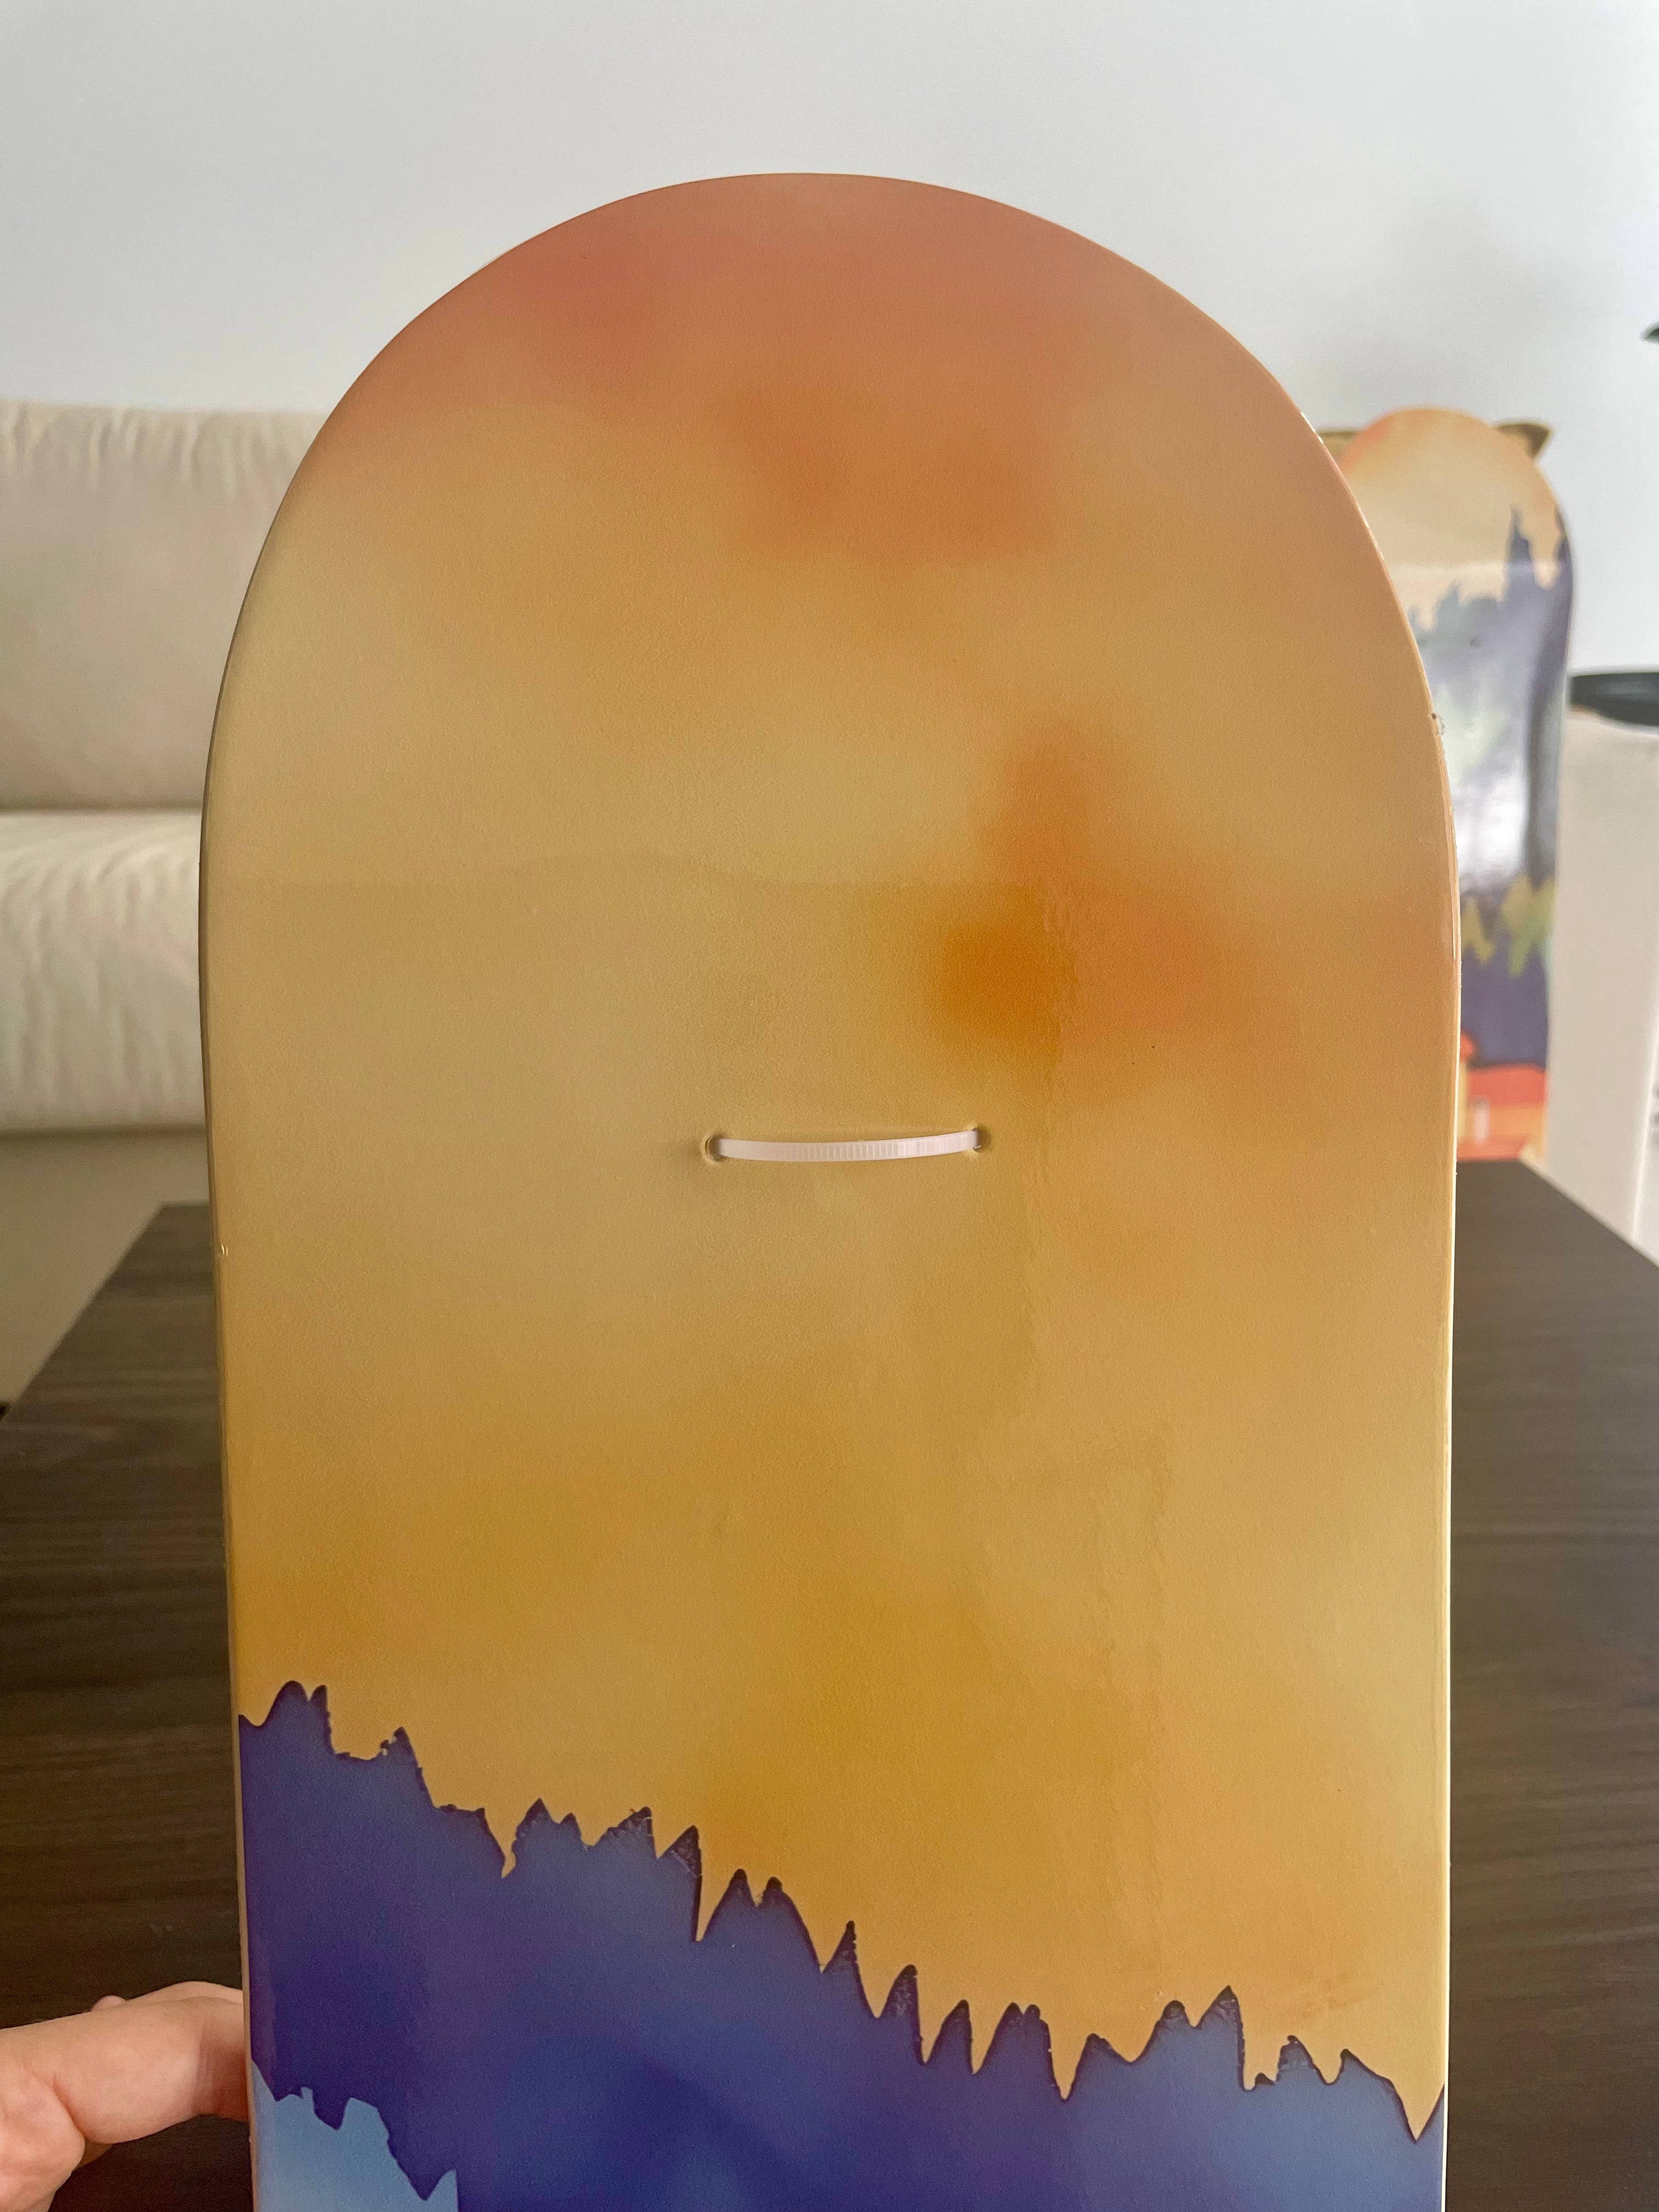
Pierce the front of the board
Using a sharp object (such as a nail) pierce the front of the board, beginning on the artwork side.
-
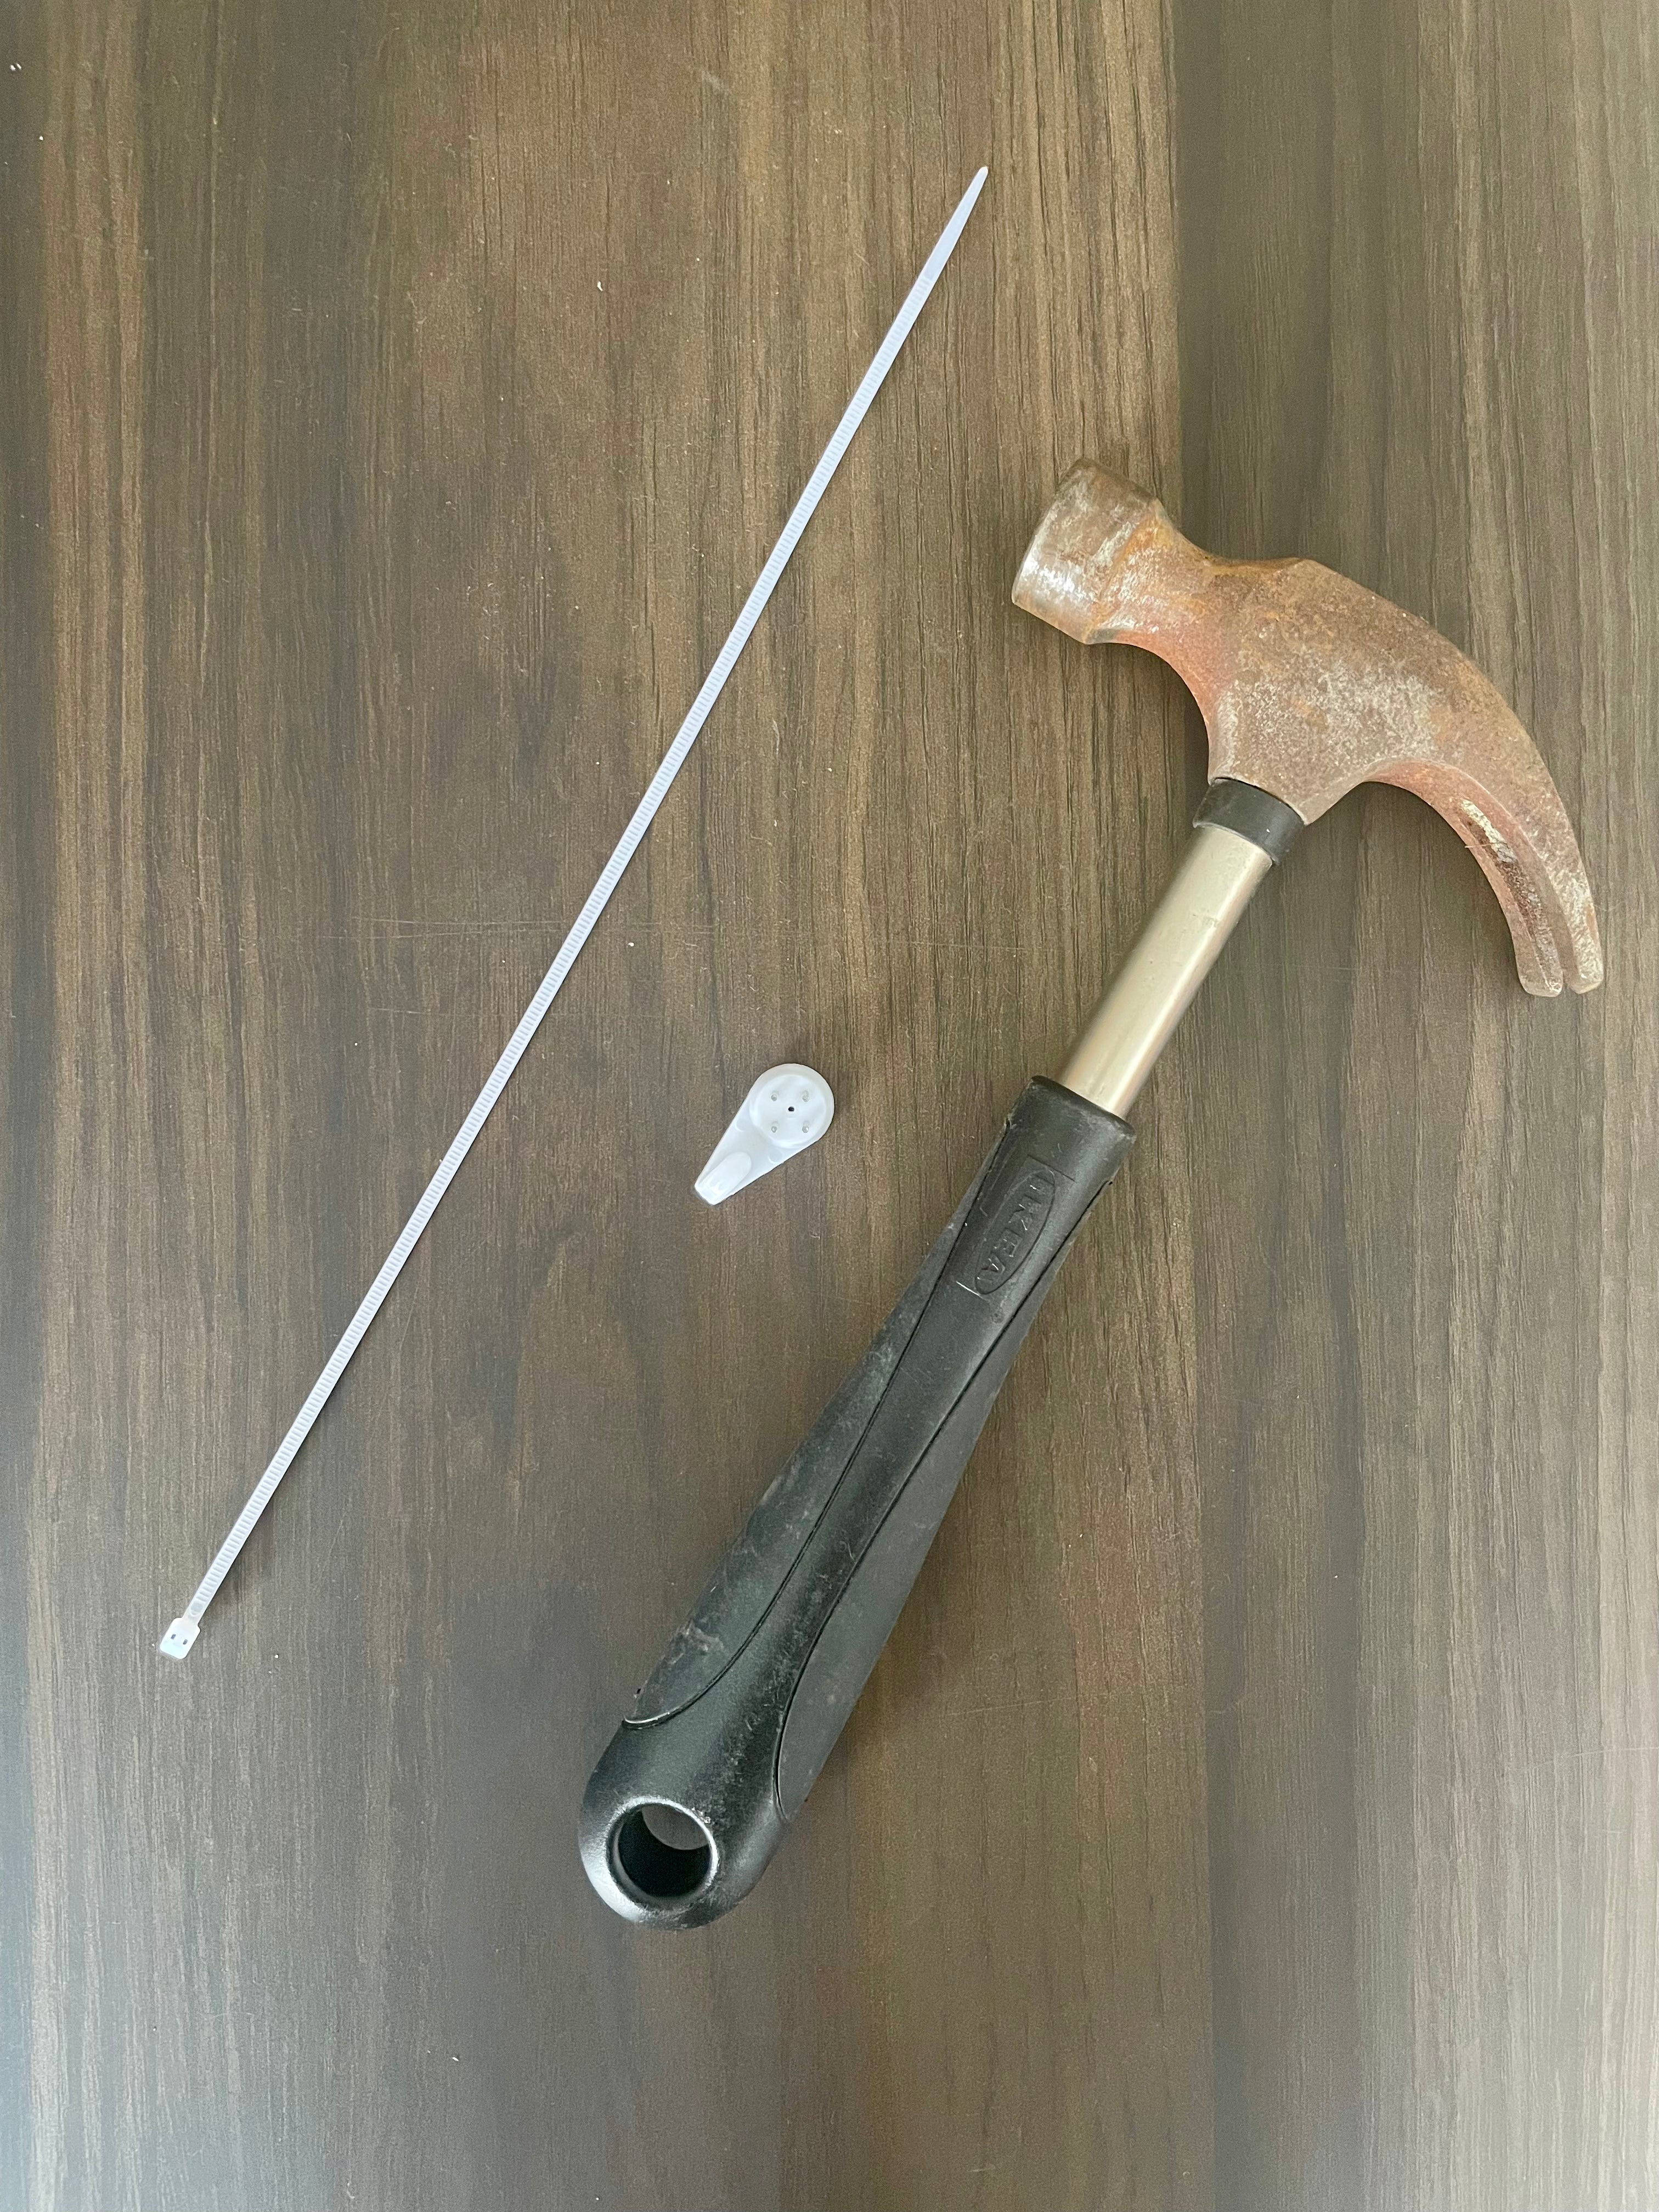
Zip ties and hooks included
Your board will come with zip ties and hooks for optimal adjustability and minimal impact on coverage.
-
Thread the zip tie
Thread the zip tie through the two holes, with the ends of the tie coming out through the top side.


-
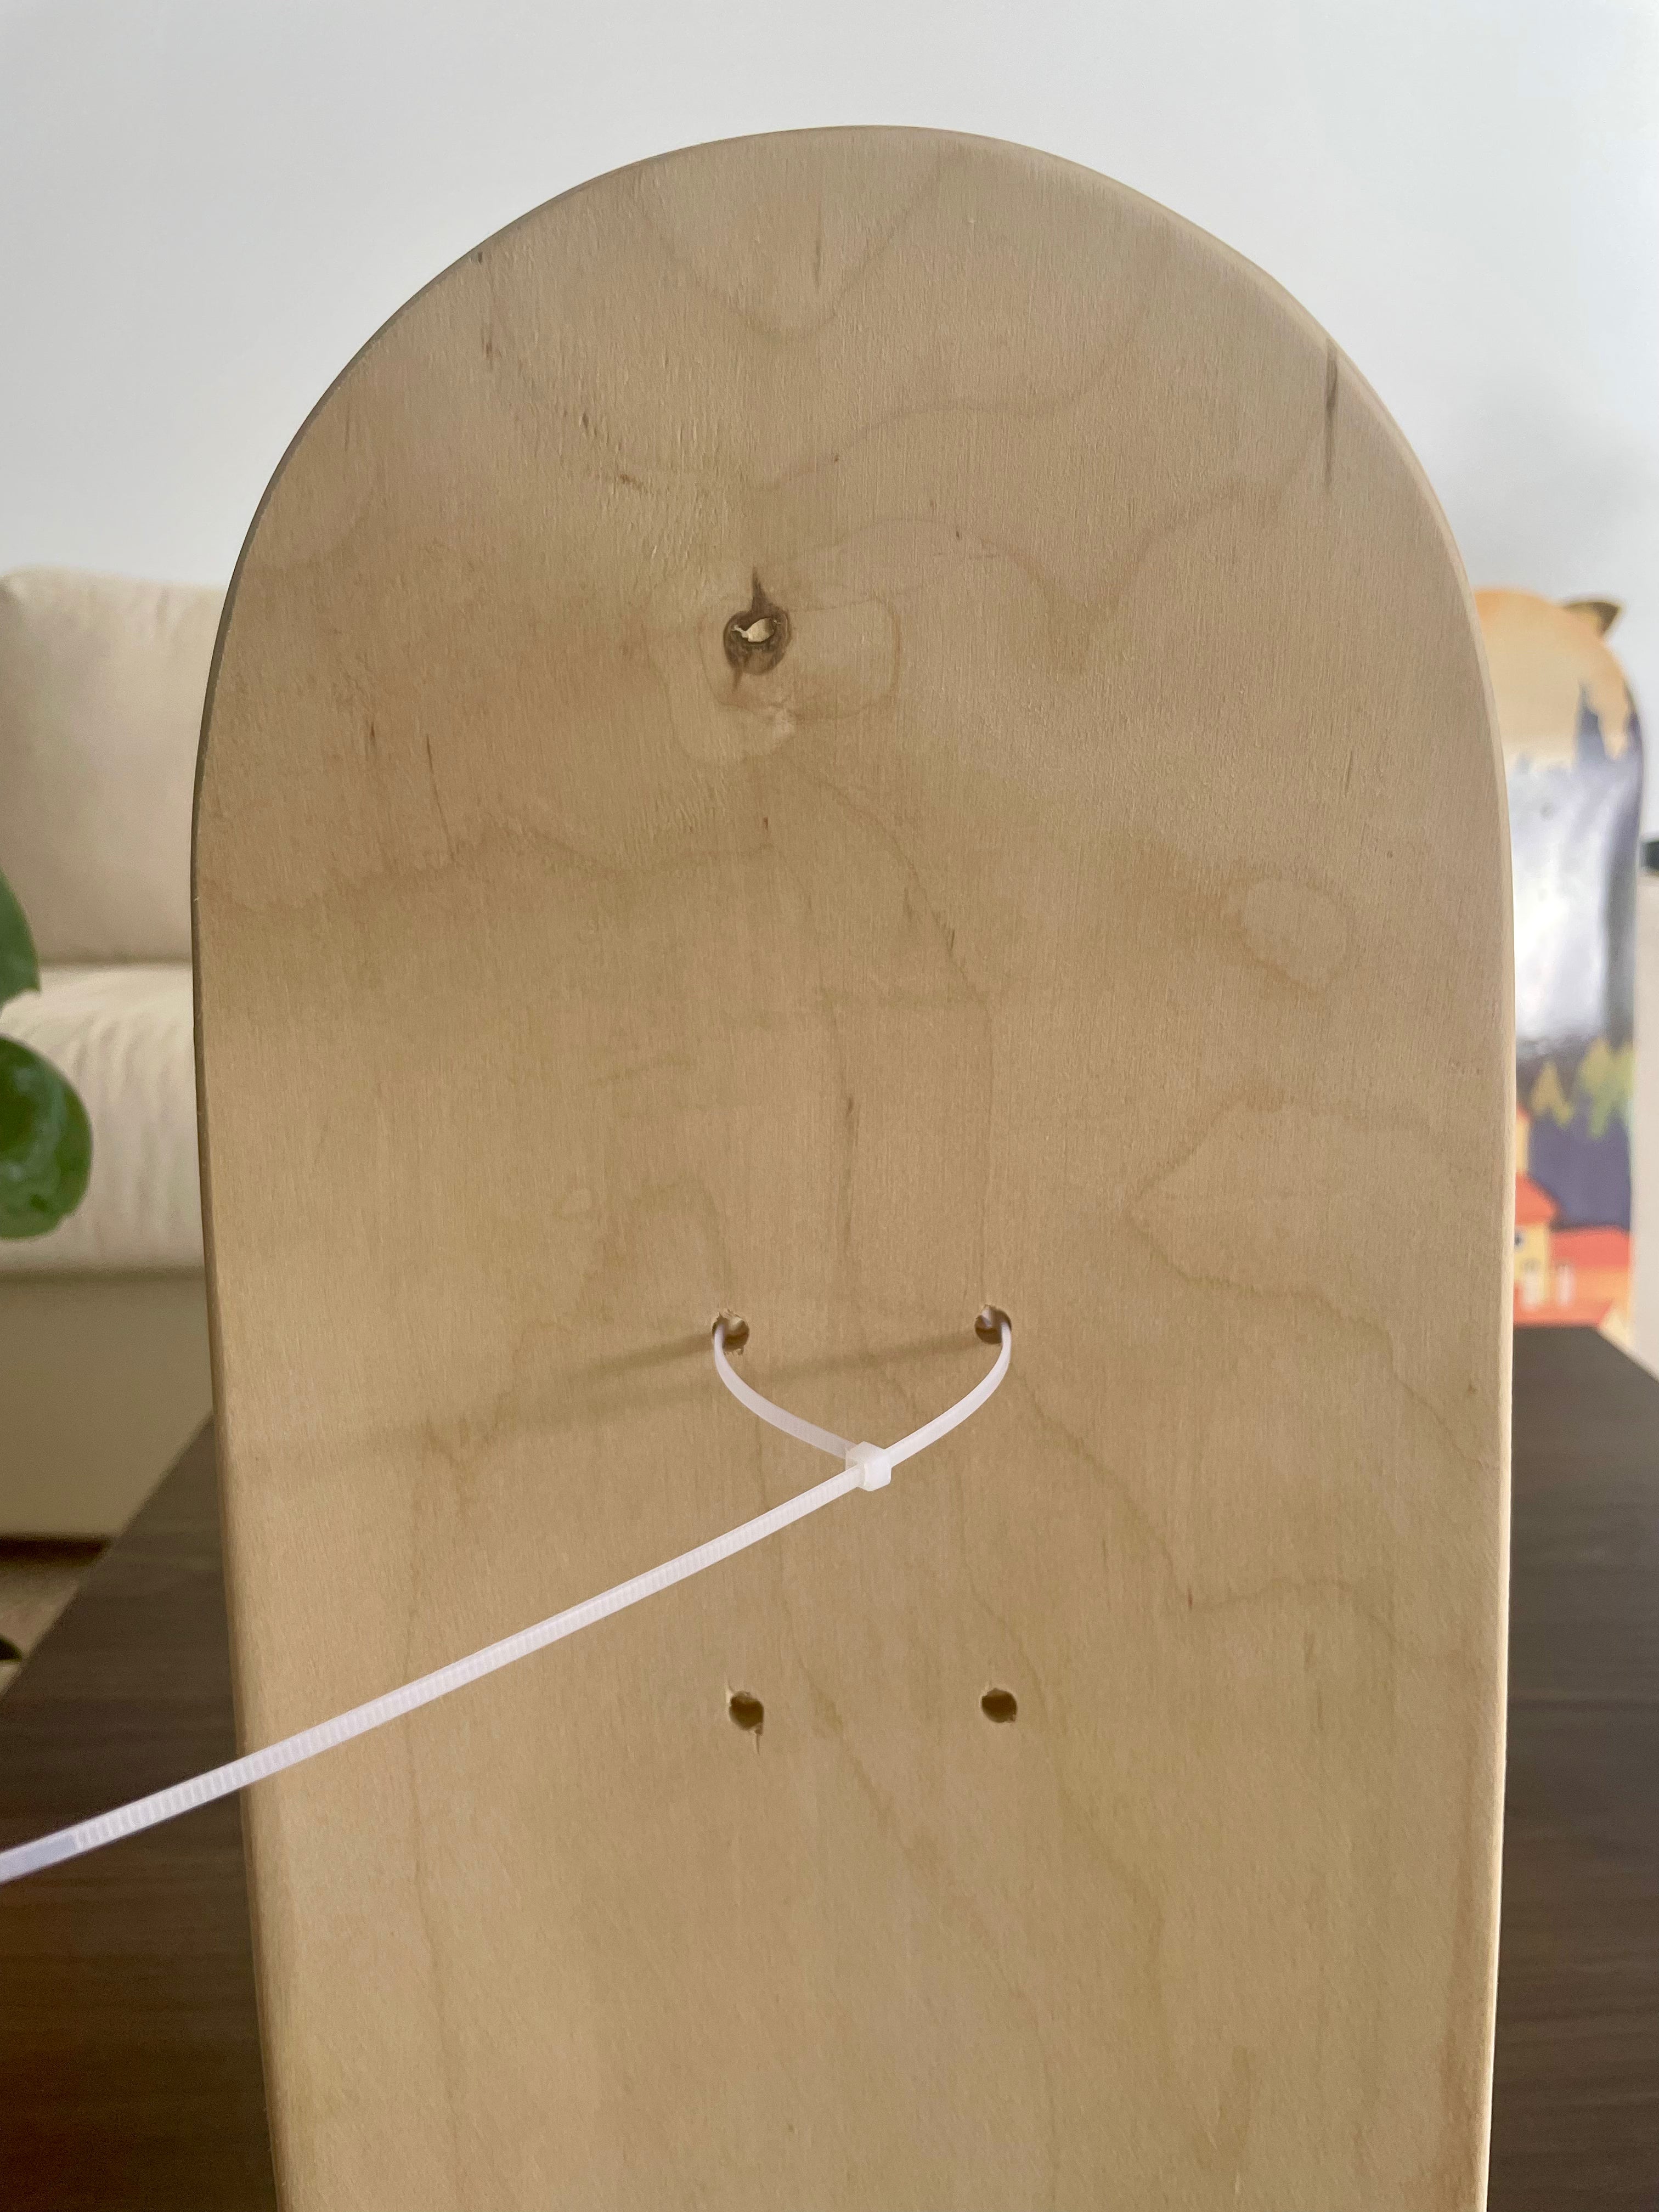
Tighten the zip tie
Tighten and adjust the zip tie to your preferred hanging length (ensure all boards are the same).
-

Adjust and trim
Once adjusted, you may choose to tidy up the end by cutting of the excess zip tie not needed.
-
Ensure a snug fit
Turn the board over and make sure the ties lay flat and tight against the board.


-
Select hanging location
Taking time to measure and check, select your hanging position and hammer in the included hooks.
-
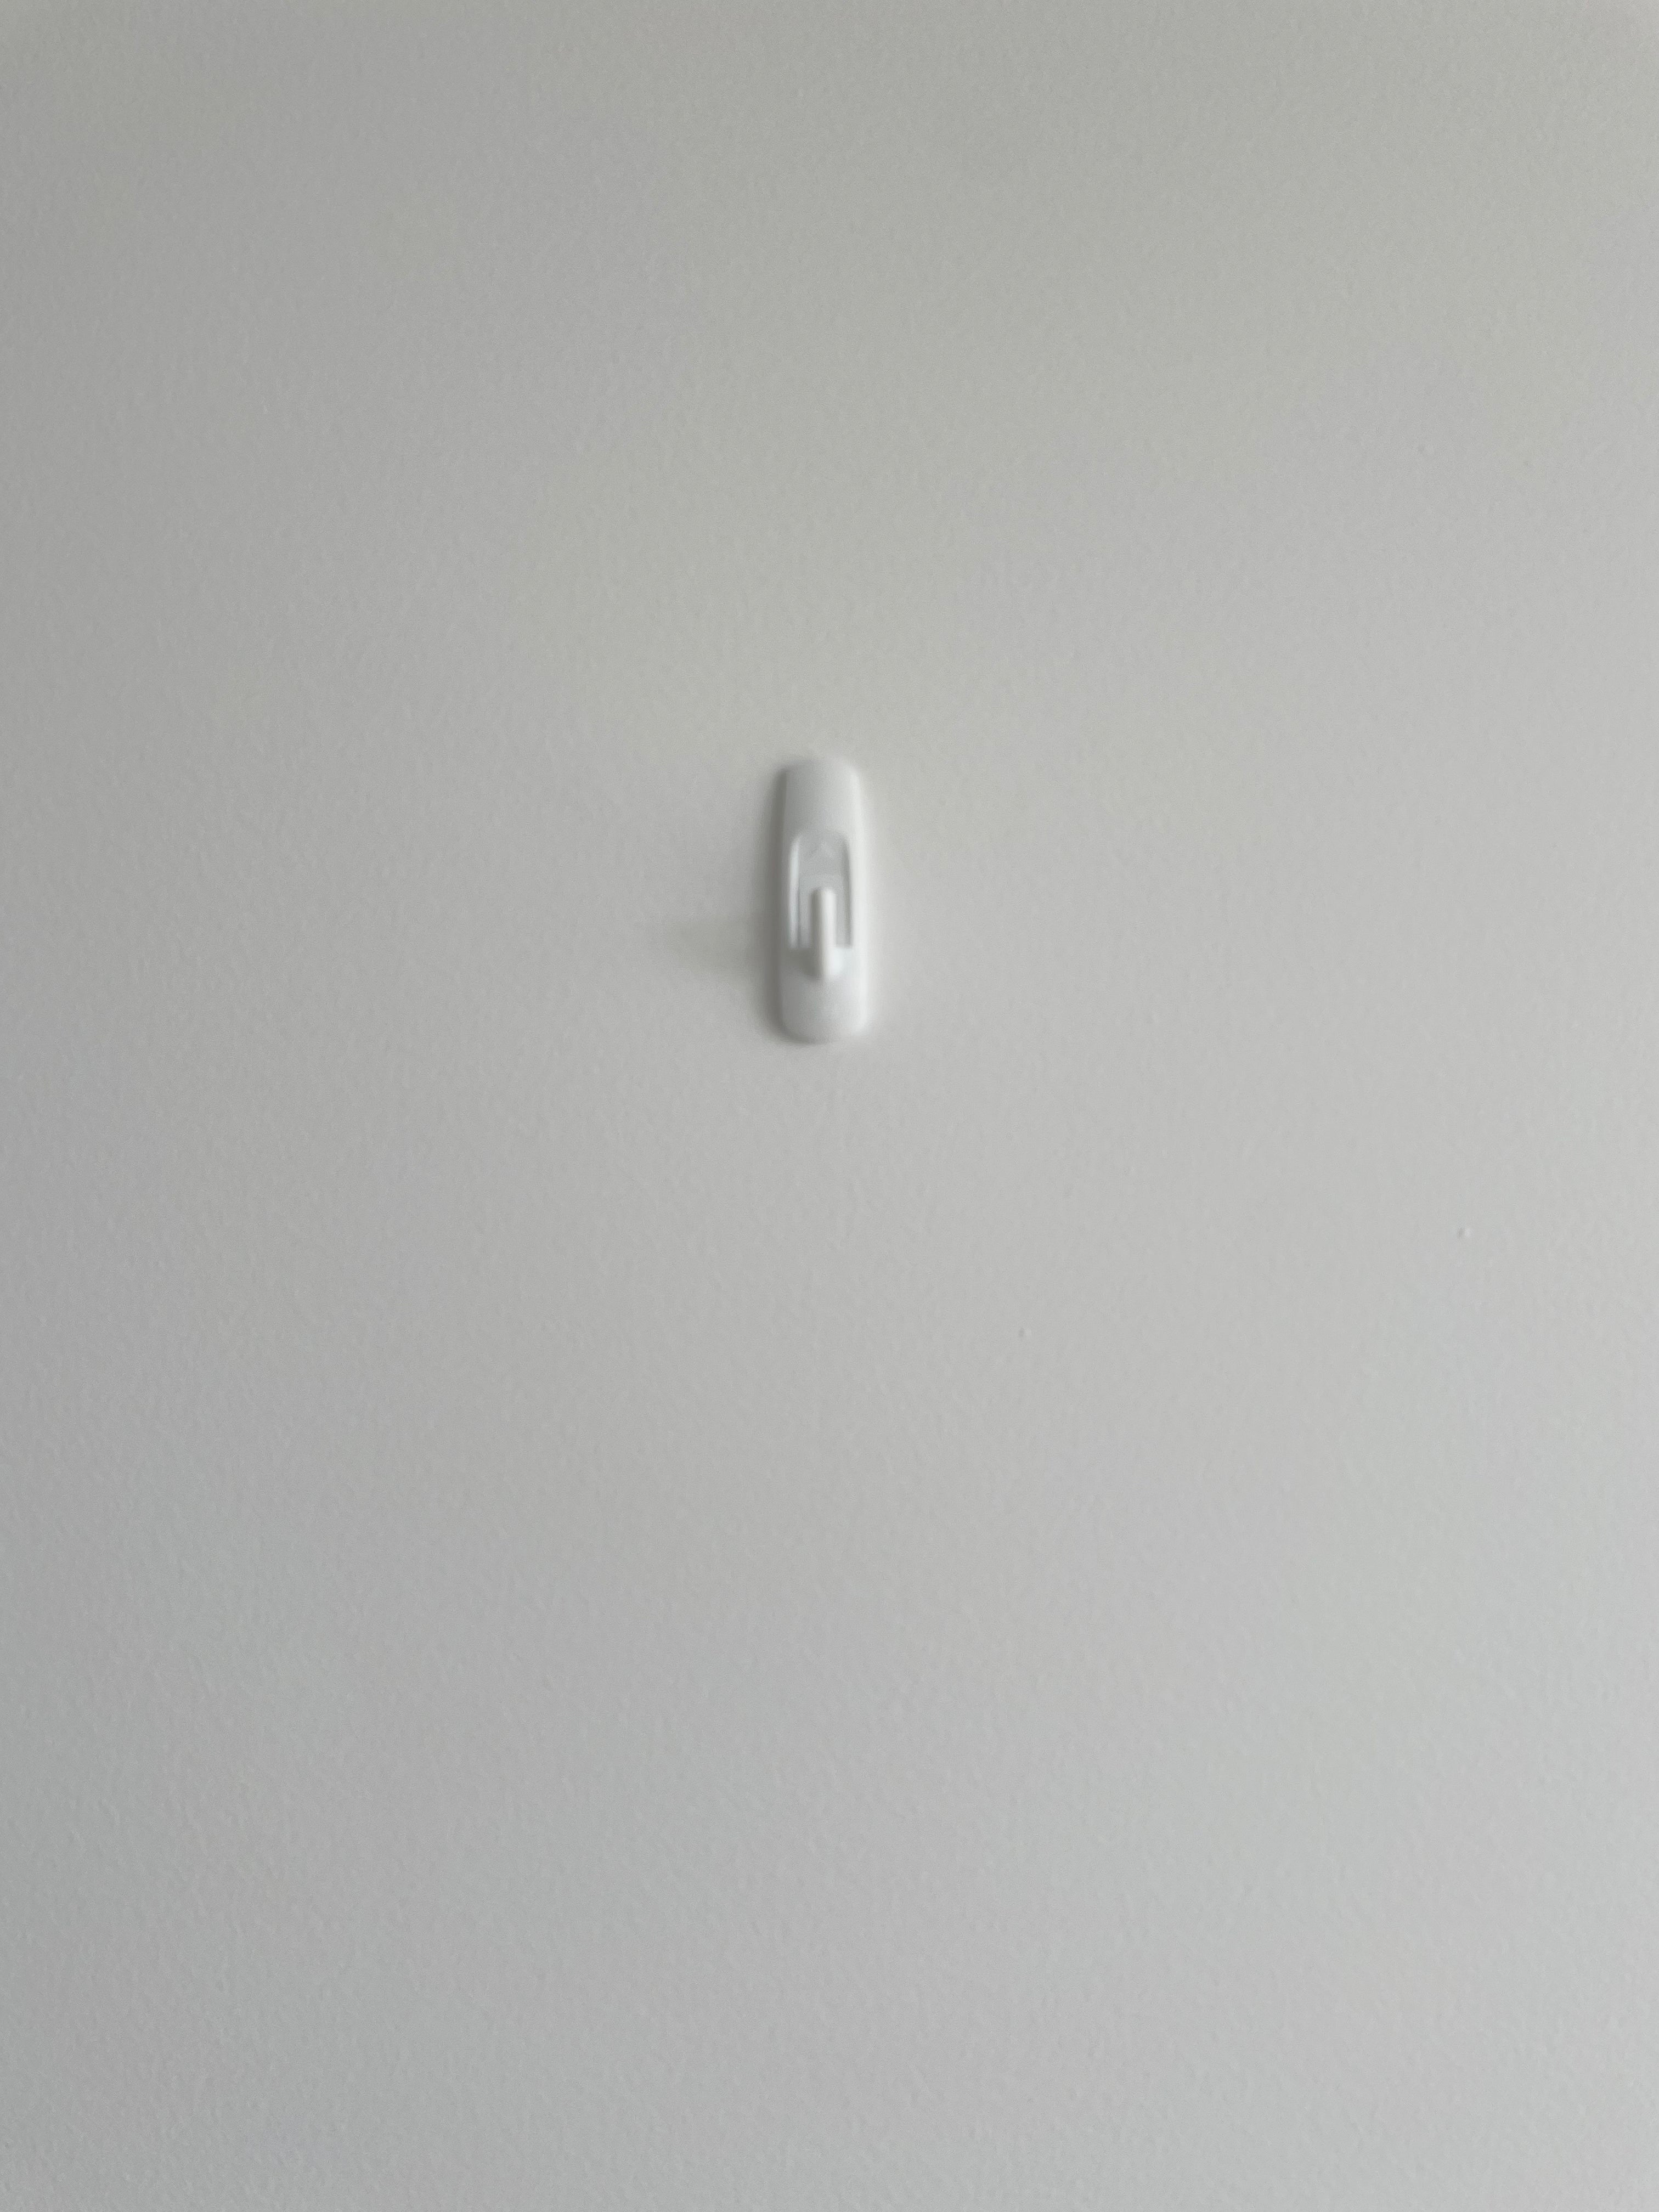
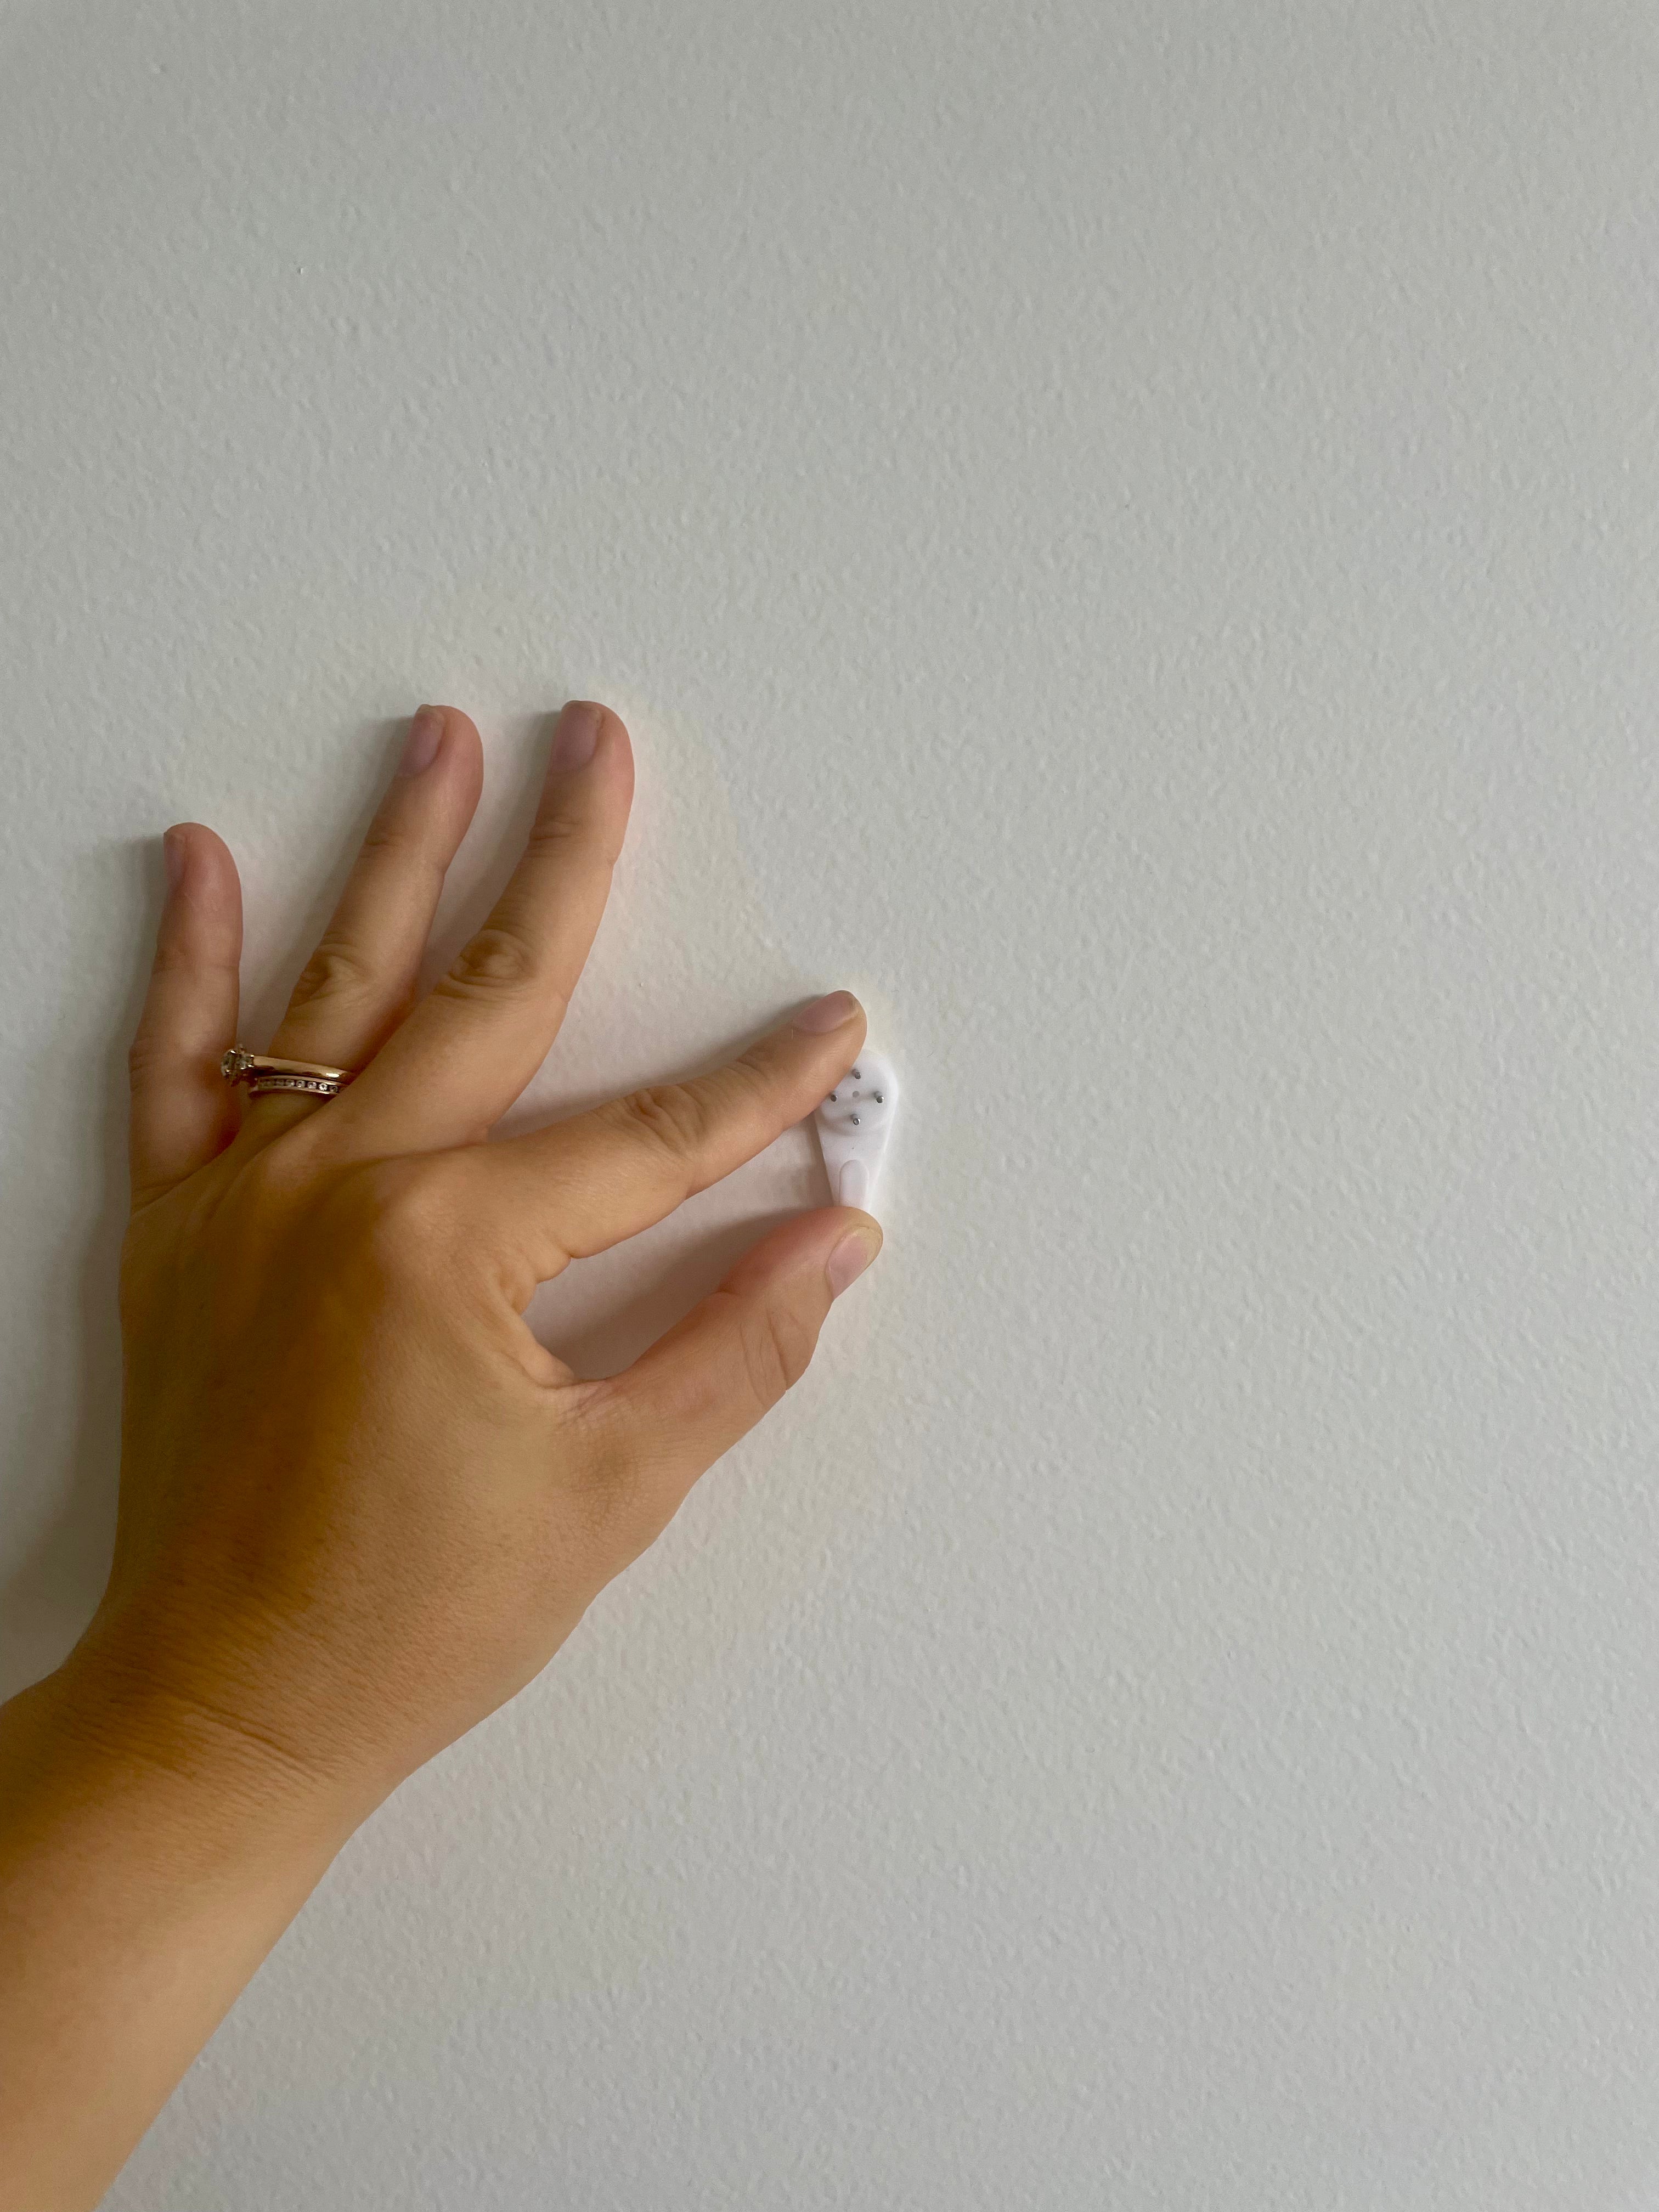
Alternative hanging methods
Here we have utilised removable hooks that hold up to 1.5kg capacity (great if you're renting).
-
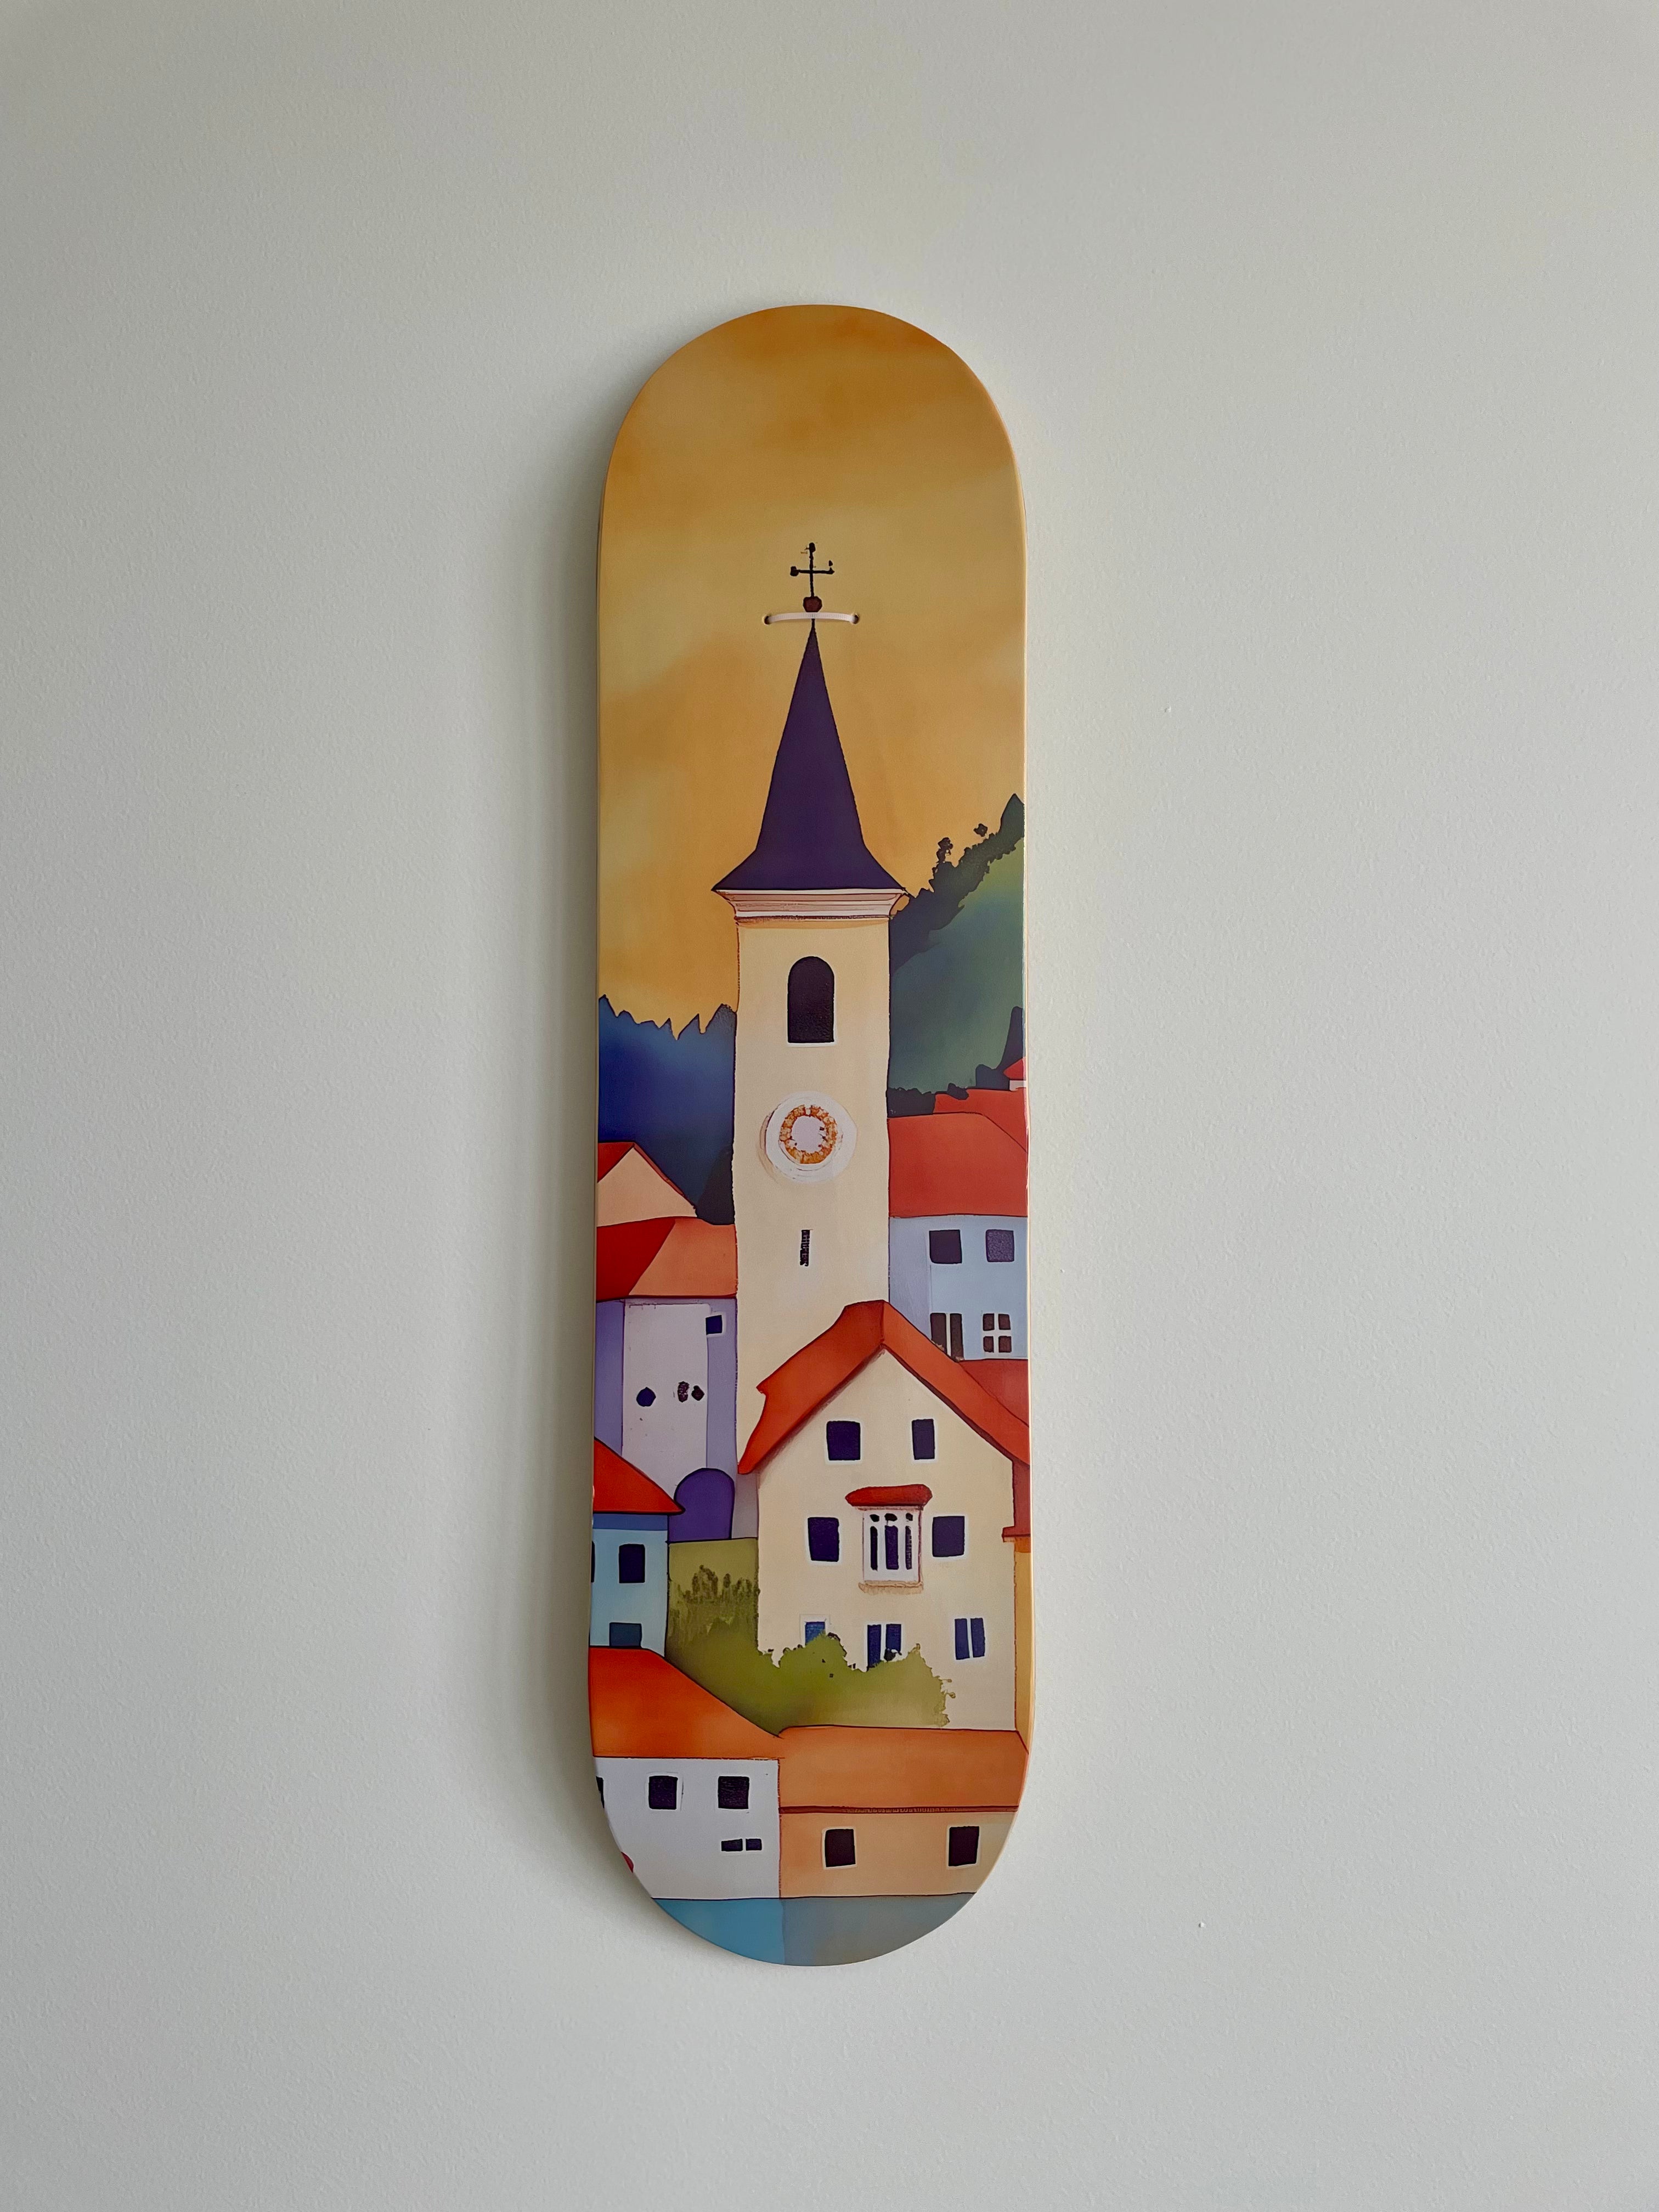
Enjoy your new board!
When the hook is securely fastened, your board is ready to be hung up and enjoyed.


